


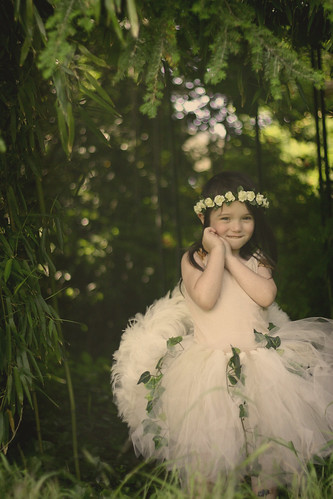
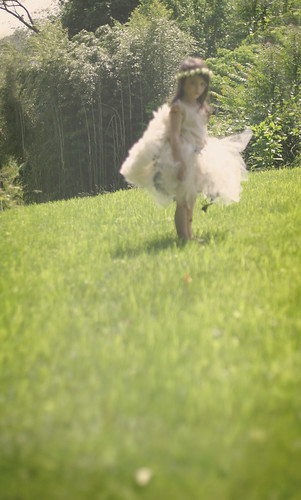
 A few months ago a friend of mine asked me if I could sew a dress for her daughter who was going to be a flower girl in an upcoming wedding with a 'Midsummer Night's Dream' theme.
I said sure, if you let me photograph the finished product for the blog. Deal.
So we perused etsy for some good ideas. She fell for the knotted tutus. Fortunately, I knew exactly how to make these. Not only are super easy but they require NO SEWING! Anyone can make one.
So she came over to my house one night and helped me cut the material while I knotted it around a piece of elastic. This is the finished product.
After reading all your wonderful survey comments I was surprised to discover that many many of you would like to see more tutorials. So, I'm taking this opportunity to write one.
First step is to purchase your tulle. You may not be able to tell from the photos but we bought ours in varying complimentary colors. This gives your tutu some depth and character. We choose ivory, tan and gold. I wanted to throw in a puce color but the bride's theme is more of a royal blue.
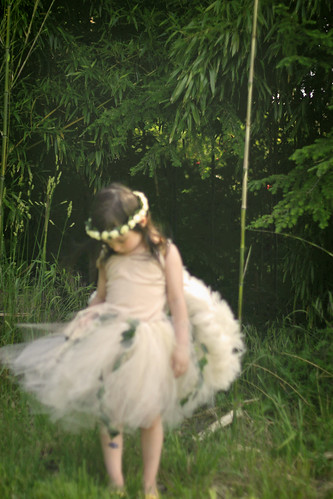
We bought 6 yards of tulle! Varying colors. This was enough for one poofy skirt. The amount of poof you want will of course depend on how much material you purchase. You can get anywhere from 4 to 8 yards depending on your child's measurements. To give you some idea of what may be right for you, Lily is nearly five years old and we used six yards.
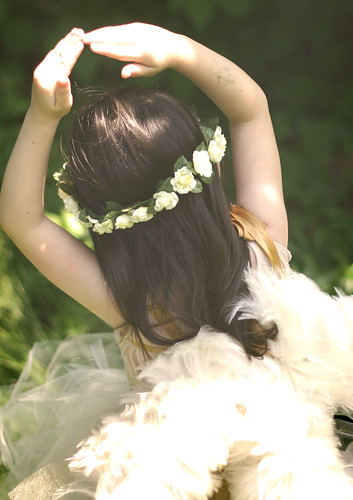
We also added small vines with wire running through the stems bought at Micheal's. You can add any other embellishments of your choosing. Ribbons would also do the trick.
Don't forget the elastic. One yard will do.
Next step. Cut your tulle. Most fabric bought at fabric stores is 45" wide. This makes cutting easy. Just cut on the fold so that you have two long pieces. Do this with all your colors.
Then cut the tulle again into 4" wide strips. This may look WAY to short but when you put it on your little toddler it's actually just right. Feel free to cut the strips once you have knotted them on the elastic to the appropriate length.
Once you have all of your pieces cut set them aside to make the elastic waistband. First, measure your child's waist and cut the elastic accordingly. Then sew the two ends together (sorry, I lied, there is a little sewing involved).
You can also use a ribbon instead of elastic. Just be sure you have the correct length since you won't have any stretch. This can be nice if you want to leave extra long ends to tie together and make a pretty bow in the back or front.
 Then FINALLY you can begin knotting. To knot the tulle onto the elastic, fold one strip of tulle in half and place it under the elastic so that both sides are touching the elastic and the folded top is peaking at the top. (see bottom illustrations for help).
Then take the two ends and fold them up and over the elastic and through the hole made by the folded tulle peaking over the top of the elastic (see illustration) and pull through so that the knot is tight.
This knot is beyond simple. Trying to explain it makes it sound really awful. But just look at the below illustration to see what I mean.
Do this for the rest of your pieces until you are finished.
To add the vines in the photos I stripped the ends of the plastic vines with a wire cutter (see below illustration). Then take the exposed wire and wrap it around the elastic.
If you want to use ribbons instead just knot them as you did the tulle in varying intervals.
And VOILA! You're done!
Not to hard, eh?
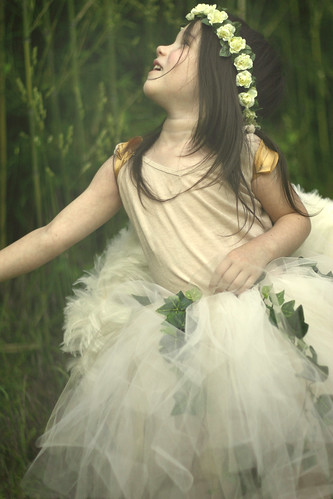
Lily is also wearing feather wings. For those I just unraveled some wire hangers and shaped them into two teardrop shapes and fastened them together with string.
We then bought a feather boa and tied it with string to the wire frame.
Then I wrapped the gold ribbon in a criss cross around the two tear drop wing shapes and knotted the ends together.
I then cut two more stripes of gold ribbon and tied them to the criss crossed ribbon.
Finally I tied the one of the gold strips around Lily's left arm and the other gold strip around her right arm.
I used a plain nude colored cami from my closet for her top. I tied the straps in knots so it would fit her. Most camis are pretty tight and fitted so if you have one in your closet this trick may work for you too.
Feel free to link to this tutorial if you like. Use any pictures you think would help:)
Create a Link


 Like not spending money?
45 {comments}:
I created a link in my sidebar with one of those cute photos!
I've made tutus before but never knotted at the elastic... that's genius. Sometimes sewing the tulle around the elastic band makes it a little bulky. Next time I will try the knots!
Love it! I'm a new reader who asked for more tutorials :) Thanks sooo much! can't wait to try it out.
You are so creative. I wish I had known about this when my granddaughters were young enough to wear it. Maybe I'll get lucky and one of them will want to dress up as a ballerina for Halloween or something.
Have a super week and
God Bless,
Mimmy
What a sweet tutu! Love the ivy - I made little B a black and lavendar knot tutu a year ago using the ribbon instead of elastic. I'll hop over to your flickr pool and add some pics!
Susannah @ art nest
This is absolutely beautiful!!! I can't wait to see Gracie. Thanks for making something so beautiful and whimsical for my special day! We will be sure to share pictures of your creation in action! -Ally
thanks for the tutorial.
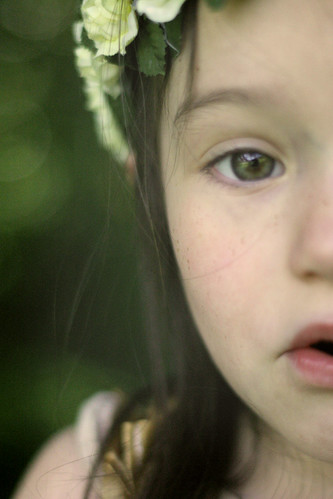
lovely pictures, as always.
Thank you for explaining it all along with your beautiful pictures :0) It is so nice to hear how something beautiful was made
Thanks so much for the tutorial!! My daughter is nearly 10, but I'm sure she would still love this!! And I have four little nieces! What wonderful gifts these would make.
I'm so hooked to this site. :-)
This is such a clever idea with such a dreamy result!
How awesome of you! I made my daughter a pumpkin at Halloween with an orange tutu but used the harder tulle and knotted it in a completely different way - next years tutu will be easy as pie thanks to this tutorial!
Very fun, I've had the knot tutu's on my list of things to make for my nieces for a long time but I've never thought about adding greenery, that turned out so great! You've definitely inspired me to get to those tutu's soon now.
wow! as someone who has no idea how to sew, i'm thoroughly impressed and now suddenly wanting to learn asap! great job!!
gorgeous! what an amazing ensemble.
thx for the tutorial!
Great pictures, i'm impressed !
LOVE IT! Thanks fo listening to our pleas for tutorials.
I linked you up on my blog- I LOVE this! Thanks so much for sharing!!!
Thanks for posting another great tutorial - my little cousin will love this. She looks so cute in the tutu!
This is SO COOL!! Thank you for sharing a tutorial, I greatly enjoyed the idea and will be using it to make one for my friends daughter. YEAY!
Your blog is visually delicious! I cannot wait to read through some of your older posts.
hugs,
Debbie
Your daughters are so cute it's absurd!! Lucky you to have such energetic and photogenic little models! :)
Some more tips: lay two pieces of different colored tulle on top of each other before you do the knot to get the colors and depth directly on top of each other. Also, if you're making one for a baby (0-2 yrs), you can buy elastic headbands that are usually just the right size for a baby's waist. They they're really sew-free!
This blog is incredible! Those are very creative ideas!
This tutu and accessories are absolutely stunning. I've done a few tutus and they really aren't that hard. But my tulle strands eventually get tangles within themself. I don't know how to keep them from getting like that and all in the middle. Maybe I should of made it longer and that would help.
GREAT JOB once again!
For any others out there who don't sew, you can by the ouchless stretchy elastic headbands (child size) to use as the elastic waistband! Love your tutu!
Thank you thank you! I have a birthday party coming up for two little girls in two weeks, and I wanted to make them each a little tutu out of the tulle from their parent's wedding in February. I didn't know how I was going to do it yet, but I love the simplicity of this--it will make it so easy!!
Those are darling and so easy!! I've made a couple for my girls and making a couple more to surprise them with at Christmas
1
http://untilwednesdaycalls.blogspot.com/2009/07/tu-tu-for-two-year-photos.html
Thanks so much for the clever ideas!
I can't believe how adorably cute these are!
I'll have to make them in several colors so all the little girls who come over to play will have one - otherwise, I'll have an all out cat fight on my hands.
BTW - I came over from the "Jonas Family" blog.
This is so great! I'm so excited to try it out, and to share it with my readers!!
Oh my goodness!!!!!!!! PERFECT! My niece Alexis, loves to play ballerina and she doesn't have a tutu. Please enter me! She would love that (she is three). *pick me pick me* ;)
So beautiful! I might try to make one for myself...even though I am 22 :)
so beautiful!this is a fantastic dreamy tutorial!
I am so eager to have my daughter to be able to make her such a lovely faery tutu:))
it's a great idea when babies have to be dressed up or just to take wonderful pictures:))
thank you for sharing
blessings
My daughter would go crazy over this!
GORGEOUS. I'm going to make this with sparkle tulle I found at www.shopceliarachel.com. I think it will look spectacular!
I've bookmarked this tutorial for a while now just waiting for a girl to make one for. It has finally happened!
I feel silly for asking but I'm not quite sure how long the fabric strips should be. I gather they are 4" wide. Does cutting on the fold mean lengthwise? So would I end up with 22 1/2" by 4" strips?
Thanks so much.
Could you email me at if you have a moment:
sarah at sassypriscilla.com
Love the tutu soo cute! Iam thinking maybe my sister little girl might like one.Spring about here she would love it.
Thank you for sharing!
Great tutu!! The ivy is a great addition. I have a tutu on my site for little girls to dress up in as well. Check out my site and let me know what you think.
The-Hobby-Barrel
Thanks for the tutorial. I included the link to it in my blog post
http://muffinsnmore.blogspot.com/2010/03/heart-princess-costume.html
Hope that is alright. :-)
I LOVE no-sew tutus plus the embellishments you added are great! I bet this was a BIG hit! :)
Jenn
Thank you for this ~ a friend of mine shared it with me and two of my daughters were flower girls this year, so I emailed your blog to the bride and she LOVED the idea. We ended up using this as the outfits for the reception which took place in a castle. It was perfect.
I made one of these today for my daughter to wear to a renaissance faire using black, navy, and shiny iris tulle. It looks AMAZING! That you so much for posting this!
Wow! I didn't think that a skirt like that would require no sewing skills whatsoever. Love it! You're awesome for sharing so many wonderful tutorials~~ <3
Ren
http://pupuren.com/weblog
Hello, I added a link to this tutorial on my blog, and made a translation to Spanish, adding some other pictures. Hope you don't mind!
By the way your pictures are beautiful!
Thank you. I made one the other night for a friends little girl - her name is Lily too! I put a couple of pictures on my blog and linked back to you. http://motherrhythm.blogspot.com/2010/11/because-every-little-girl-should-feel.html
Lovely! <3
Way easier then the petticoat I made!
Post a Comment