Showing posts with label tutorials. Show all posts

Foam Board Pelmet Boxes

September 27, 2014

A friend and I got together yesterday and made pelmet boxes for the windows in her nursery. This is a very simple project that anyone can do. You don't need wood, you don't even need a staple gun. Just got glue and an exacto knife (in fact we just used scissors but an exacto knife would make things easier). Get the how to below!

Duck Tape Greek Key Roller Shade Tutorial

September 22, 2014

This is a Sponsored post written by me on behalf of Walmart for SocialSpark. All opinions are 100% mine.

Duck Tape® isn't just for taping anymore. If you haven't lived under a rock for the last few years you've seen all the amazing things people have been doing with Duck Tape®. Prom dresses, purses, belts, hair accessories. YOU NAME IT! It's probably been made with Duck Tape®.
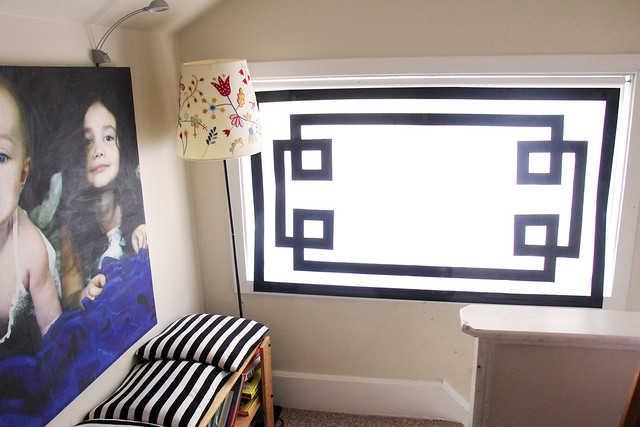
I just found a great use for it myself. For home decor it can substitute great for bias tape on roller shades! It's even better than bias tape because you don't have to use glue. And all your edges look crisp and clean.

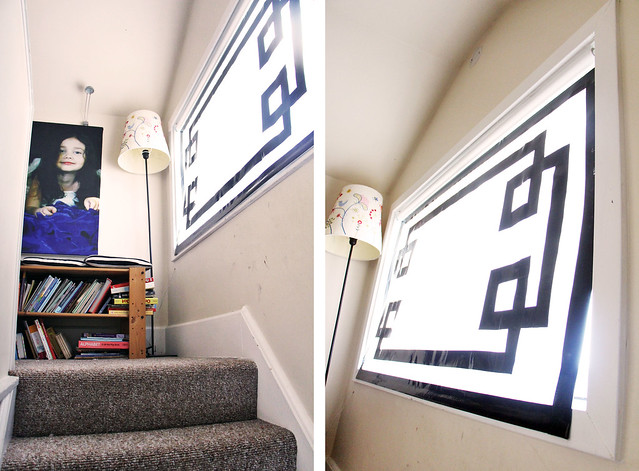
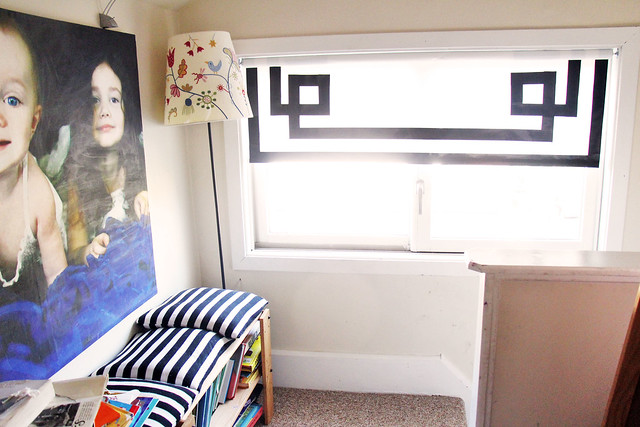
In my upstairs landing we have a wide window. For a long time we left it uncovered. Then after a few houses around us were broken into we decided we should probably cover it. The quickest and cheapest thing to do was buy a roller shade. I've really never been a fan of the look of vinyl roller shades. However, I do like the ease at which they open and close and also....their price! So I made roller shades with bias tape for our bedroom. And I loved they way they looked so I wanted to do the same thing to the upstairs window. But honestly, the hot glue doesn't last forever and I've had to retouch them up at least two times since I finished them.

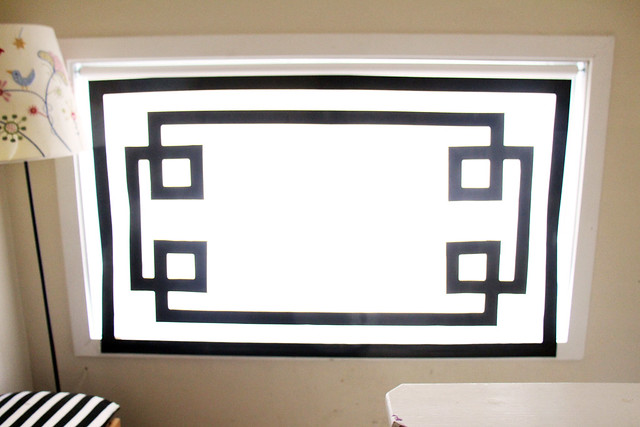
For a while I left it a blank white vinyl roller shade and it looked pretty ugly. Then I thought to use Duck Tape® instead of bias tape! No hot glue. Just roll and press down. You can see how it turned out! I only wish I had taken a "before" photo so you could have seen just how plain the space looked prior. If you would also like to try this project I included a template and tutorial below! It's pretty simple and easy!

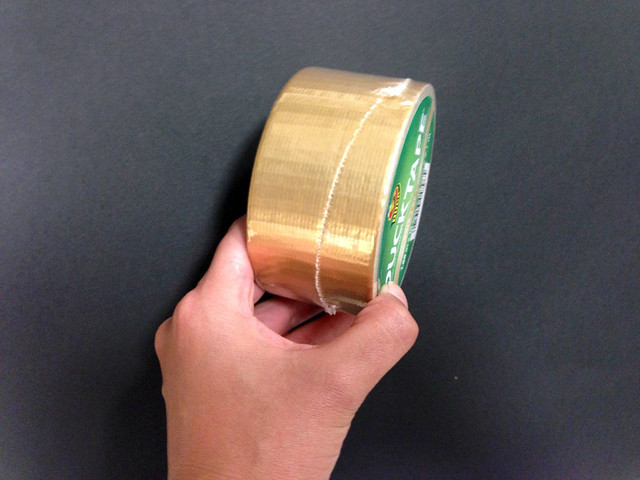
Another idea which I wanted to try was doing a GOLD Duck Tape® Greek key border! But not on white vinyl. If you had a light blue roller shade or pink. This would look pretty interesting! You could always paint a vinyl roller shade blue or pink. You can also cut the vinyl off and attach fabric. See a tutorial on how to do that here on my blog!

If you want even more creative inspiration with Duck Tape®check out @TheDuckBrand on twitter. Great for back to school projects like pencil cases, notebook decoration, hair accessories....etc.You can buy Duck Tape at Walmart!
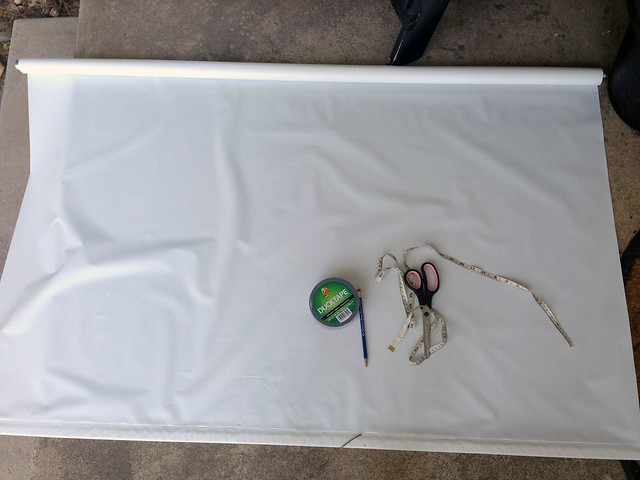
Step 1: Gather your materials.

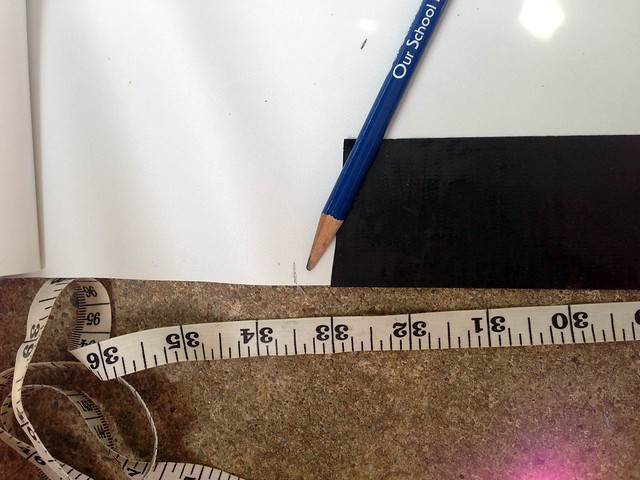
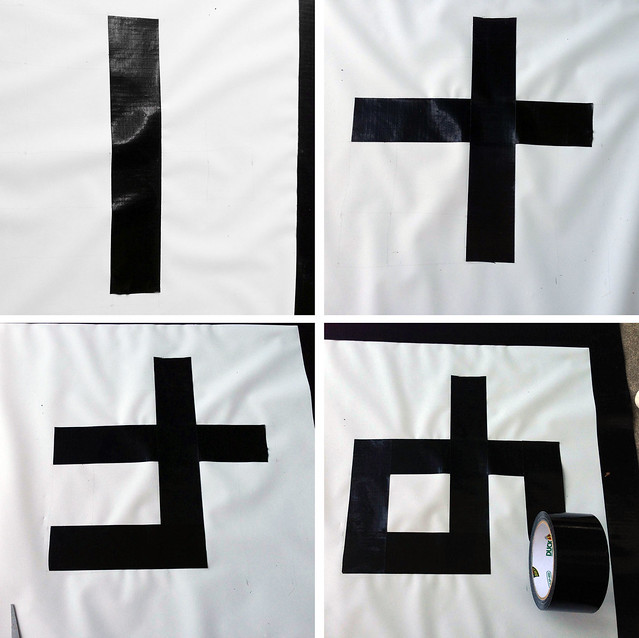
Step 2: Start taping around your border. I also added a black border because I think it helps define the Greek key design instead of having it sort of "float" in the space.

Step 3: At the top, mark where you want to stop. Don't go to the very top of your vinyl if your window is smaller than the length of your shade. Measure your window to know where to stop your tape.

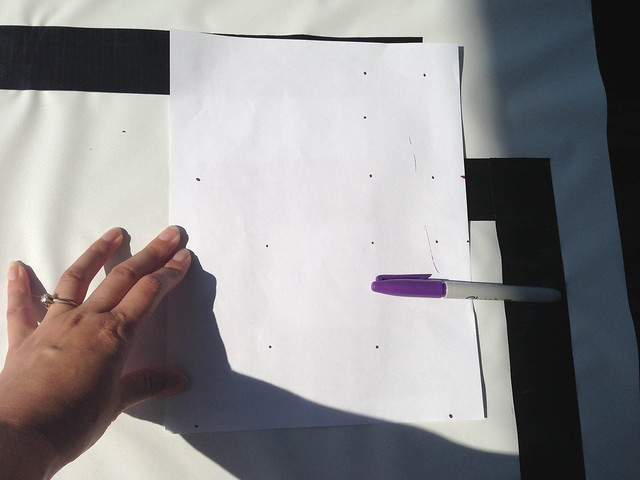
Step 4: Two inches down from your border on either side place your template on the shade. Download template here. Make dots at every corner and press hard enough so that you can see the dots through to the vinyl shade. Lift your template and connect the dots.

Step 5: Now start adding your tape to form your Greek key using the outlined shape you just made with the template.

Step 6: Repeat for the next three Greek key shapes. And remember you must leave two inches of space between the side and top or bottom border when you are transferring your template image to the vinyl. Done!
Visit Sponsor's Site

Homemade Christmas: Hot Hands Glittens (Glove/Mittens) Pocket

December 4, 2013

My sister and I both have this strange condition where our finger tips loose circulation even in semi warm conditions. It's called Raynauld's Disease. We think we inherited it from our father who also seems to have it. This is what it can look like. 
My hands often loose circulation in the middle of the summer if I'm shopping in a heavily air conditioned grocery store. So as you might imagine the winters in Pennsylvania are not kind to our fingers. Some say it's like "being allergic to coldess". I thought that was funny.
To help my sister I made these for a Christmas present and I'm going to include a box of Hot Hands (air activated) hand warmers with them. To make the glittens I bought a pair of touchscreen gloves from Walmart and added a fleece pocket to the back with her initials on it which I embroidered. She can put the warmer in the pocket and then pull the pocket over her fingers to keep her hands extra warm while she's driving, walking the dogs, going grocery shopping in the summer;-P.....whatever!!!! 
The pocket helps keep the warmer in place so it doesn't move all around the inside like it would inside a mitten. And if she needs to use her fingers she can just take off the pocket and let it hang.

Get the how-to below!
Materials:
Fleece Gloves
Matching Fleece Fabric 1/4" yard
scissors
sewing needle
embroidery thread

Step 1: Place the middle of your glove at the bottom of your fleece. Trace around the glove. Leave about 1/2" inch on either side and an inch and a half above the glove. Cut SIX of these.

Use Tin Foil to Make Your Own Dress Patterns from an Existing Garment!

August 14, 2013

I'd love to try this sometime to make an entire dress. Use tin foil to make a pattern from an existing garment! Just lay your garment on a large flat table and place your tin foil over one piece of the garment. Take a soft cloth and rub over the foil so that you can see the seams in the foil. Cut along the seams of the tin foil and trace onto paper adding seam allowances. Repeat for each piece of the garment.
Step 1: Just lay your garment on a large flat table .
 Step 2: place your tin foil over one piece of the garment.
 Step 3: Take a soft cloth and rub over the foil so that you can see the seams in the foil.
See the seams!
Step 4: Cut along the seams of the tin foil and trace onto paper adding seam allowances. Repeat for each piece of the garment.
Extra Notes! Pieces that have darts are somewhat trickier. I recommend pinning the foil to the garment. To get a more accurate cut it can't lay flat so you'll have to lift it a bit. If you have a dress form it would work even better to drape the dress over the form and rub that way! Perhaps I'll do a tutorial on that later if this post gets a good response.


DIY Fabulous New Style Nursing Cover (NO SEW)

August 1, 2013

So, check out this new nursing cover style. What I like about it is that it looks like it might be a shirt. Just keep it in your bag and pop it over your head when your read to use. The retail value is $79.99 and can be purchased from Oslo but this is beyond easy to DIY. YOU DON'T EVEN NEED TO SEW as long as you use a knit material that doesn't unravel. Get pictorial my how-to below! You can adjust measurements based on your body. The pattern below was estimated using my frame. I'm 5'1" and 105 lbs. HECK, I'd make this for a friend's baby shower and it would only cost five minutes of my time. You could even get fancy and use an opaque silk embroidered fabric instead and hem the raw edges.

Nylon Tea Length Skirt DIY

May 3, 2013

I love this skirt and I've seen it a lot recently listed as a "tulle" skirt. But honestly, looking at it, I don't think it is. The fabric looks too soft and the holes look to tight to be tulle. If I had to guess, I'd say it's something closer to nylon chiffon. I bet this would be so easy to make if you took some nude colored jersey knit for the waist and sewed some gathered nylon chiffon in layers to the bottom then wore a nude colored slip underneath. You could probably make this in a day easily. No pattern necessary. And since the waist would be made of jersey knit you wouldn't have to use zippers or elastic. Just sew and done. You can buy some nude nylon chiffon here for only $1.84 per yard.

Stenciled Scarf

April 10, 2013

#12monthsofmartha
So, I loved the new Arabesque stencils Martha Stewart has been putting out. They look so Moroccan. I wish I had the energy to stencil an entire wall with one of these but I think I'll settle for a scarf. At least I can take it with me when I leave the house.

This is pretty simple and straightforward.

Just take one of the new Martha Stewart stencils and some fabric. About one yard will do.

Spray back with adhesive.

Lay on top of fabric, sticky side down.

Use some gold paint and a sponge.

Dab the color over the stencil and fabric.

Peel away. Then  allow a few minutes to dry and repeat until your yard of fabric is covered. I also think it helps to crush the fabric once its dry. It gives it a more eclectic look.

DIY Dresser Overlay

March 29, 2013

As I've mentioned before I'm making over Henri's nursery. I haven't planned a nursery since Molly was born and I never planned one for a boy so I'm having a little fun doing it. Part of my original plan was to find a Henry Link or some kind of bamboo dresser. It didn't work out so well, and NOT for my lack of trying. I looked as far as Massachusetts but didn't find what I was looking for.
I found this dresser below ($1700) and decided to try and make one for myself. At first I was going to do Overlays. And if I didn't have to buy the dresser I think I might have but with the cost of the dresser included  and the new drawer pulls it was going to be too much to order three of those. 
So instead I bought eight 3ft x 5/8 in Poplar Square Dowels. They are only $2.14 a piece, so total the millwork would be $17 instead of $50 (with Overlays). The 3/8 in dowels would work too. They're only .98 cents.
I'll show you how I made this dresser. Just follow the steps below. All you need is a saw and hot glue/. I would not recommend using a handsaw. The cut is not as accurate and it SOOO tedious. I have a table saw which I bought for super cheap at Lowes and it works great. I just set the length and push the wood through. I did about eight cuts at a time. You can get a very small inexpensive table saw at Harbor Freight for only $40. It's great for jobs like this and other small mill work like mitering.

First I bought the IKEA Koppang dresser. It's only $99. The following cuts below are for the Koppang dresser. The front drawers are 31 1/4" x 8" and there are three of them.
I took the square dowels and made the following cuts:
Six 20"
Six 6"
Thirty Six 1"
Twenty Four 2"

YOU CAN PRINT ON FABRIC WITHOUT ANYTHING MORE THAN FABRIC AND YOUR PRINTER!

March 28, 2013

Guess what, YOU CAN PRINT ON FABRIC! Without special paper, without special backing, without soaking your fabric in special solution. Here's what I did and what you need to know to.....
Before we get started, four things....
First off, this is important, the fabric I used to print on without any backing was like a heavy weight WHITE canvas (not exactly canvas but something like it. I bought it in the bottom weights isle at Joanns). And it only ran through the printer when I ironed it and cut the top edges straight and clean.

Secondly, it did not work perfectly every time. The majority of the time it worked fine. But yes, sometimes it the fabric would do something funny and I'd have to start all over which might be a problem for you if you're printing something large and are worried about wasting ink (which I have some tips to get the most out of your money which I'll get to later).
Thirdly, you can print on lighter weight fabrics but you'll have to iron on freezer paper to the back or use something to stabilize it. I haven't tried it yet but when I do I'll give another tutorial on that. For now, I'm mostly doing home decor projects for the nursery and sewing room but I'm sure down the road (very soon) I'll be wanting to print on more clothing-weight type material.


Fourthly, I recently bought a brand new wide format printer recently, Epson Work Force 7520. I assume not every printer is the same so what works for me might not work for you. This is what I found from using my printer (which I highly recommend). It's not as wide format as they can get (those are thousands of dollars) but it can print up to 13"x44" which is pretty cool and best of all it was only $230. PLUS, it can scan up to 13"x19" which is a big deal when you're trying to digitize patterns. In other words, it's awesome. I love it. Here's the printer at Staples if you too are interested. BUT, here's one model lower, 7510, which as far as I can tell does everything the 7520 does except it only has one paper try instead of two and it's $50 cheaper.  You can only get it online but it has free shipping.
I'm going to start by showing you how I printed the fabric on these curtains. If you like the pattern and would like to print it yourself here it is, public domain free to download and change. Enjoy!

(PS. when all is said and done with fabric and ink it's not that much cheaper to print fabric yourself AND it's work. So unless you've scoured the internet for what you want and it just isn't there, try and buy the fabric and save yourself some elbow grease;-).
Then, I cut a piece of white heavy weight fabric 12.5"x44". I cut the top straight so the edge is clean and square. I also used some spray starch and ironed it flat. Then I placed it the top edge in my printer tray flush with the edge. Since the fabric is 44" long it doesn't fit in the tray which is fine if you're printer will print longer than 11.5" which many do! When you go to print be sure to specify a "custom" size in the menu. If it lets you type in 44" then you should be good to go, if not, bummer:-( Also, I had to hold the end of the fabric as it fed into the printer because it's so long and tends to just fall out if you don't but once it's fed and starts printing it's okay to let go.

That's it!

Some tips....

You might have to play around with the color to get a saturated enough look. I used Photoshop to adjust the Gamma Correction on the Exposure and that helped to get the saturation in the fabric that I desired. But here's something you need to know. The cheap inks you buy on the internet (the kind you refill) tend to not saturate as well. My Epson ink that came with my printer saturates WAY better than the cheap stuff I bought to refill with. I had to compensate with the saturation in Photoshop to get the same result with the cheaper ink.
That being said, I still think it's worth buying the cheap ink because it's like 1/10th the cost of the name brand ink and I can still get the same results with a little work. I bought my ink from Print Pay Less. You can buy the refillable (clear) cartridges and then buy bulk ink separately. It's great. I love it. I can physically see if my ink is low, I don't have to rely on the printer software (which lies). I buy the PIGMENT ink (not the dye ink) which is supposed to be colorfast (though I haven't tested it yet). And each bottle I buy has about four or five cartridges worth of ink in it. And four bottles of ink in each color only costs $34 total. If you bought that much brand name ink here's what you would spend:

Cyan, Magenta, Yellow Multipack= $47.49
Black= $18.99
Total= $66.48 x5 (times five because that's about how more much ink you get from each Print Pay Less bottle)= $332!!!!!!!

So, even though you have to play around with the saturation a bit and probably use more ink in the process I STILL think it's worth it.

I have other stuff I'm doing....Check out my Instagram account for two more pieces I'm working on. I'll post about them later when I'm finished. For now, hope you enjoyed the chair and feel free to ask any questions you might have. Enjoy!


 
Related Posts Plugin for WordPress, Blogger...