


You may remember my next guest, Prudent Baby. I reviewed her sweet, funny book, Prudent Advice last October. That was when I began following Jaime and Jacinda's blog, Prudent Baby. It a great compilation of crafts, recipes, DIY, giveaways, gardening, great photography and anecdotes of motherhood.
(Today's featured pattern after intro)

I'd be visiting their site if I were you;)

Together they come up with a prolific assortment of DIY crafts that look FAN-TAS-TIC!

But like I said, their site isn't all about crafts and sewing, Jacinda loves to make treats for the kiddos!

Speaking of babies, they make the sweetest projects for babies. Crib sheet tute and no sew ribbon mobile.

A little bit about how Prudent Baby came to be:
Jaime and Jacinda met in a television studio lobby in LA. Jacinda was interviewing Jaime for a marketing position. Jaime got the job and adventures commenced nationwide featuring Soap Opera stars, rides in strangers' cars, many stray hairs, and a bit of spooning captured on tape.

A few years in Jacinda stopped over at home in Rhode Island to marry a Navy man and hit the road, living in Washington DC, San Diego, and now in Dallas, Texas (with a few stops in Guam along the way). A few short months after her depressing departure, Jaime followed suit by getting married (to a skateboarder) and moving to...guess where...San Diego, where they met up again and drank a lot less wine, as Jacinda was pregnant with Clare.

One year later, Jaime moved back to LA and daughter Scarlet joined the party. A year after that, baby Quinn turned Clare into a big sister. With their creative juices needing an outlet and young ones consuming our thoughts (and time), they launched Prudent Baby and have tons of fun working together!

Now that you know a little bit about what makes J&J tick. Let them show you one of their sweetest crafts, a summer hat for your little one.
~~~~~~~~~~~~~~~~~~~~~~~~~~~~~~~~~~~~~~~~~~~~~~~~~~~~~~~~~~~~~~~~~~~~~~~~~~~~~~~
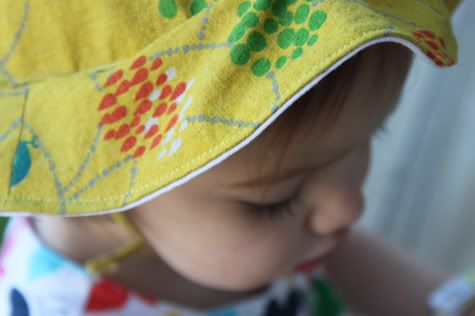
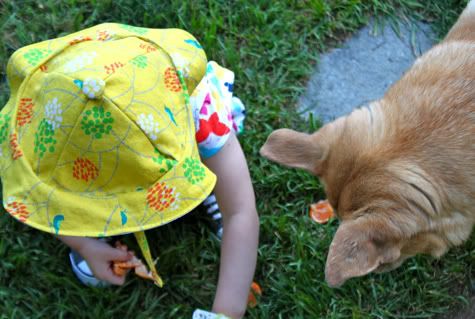
It's summer (almost)! Time to protect baby head's from melanoma and what-not. I whipped up a little summer hat and created a pattern for you.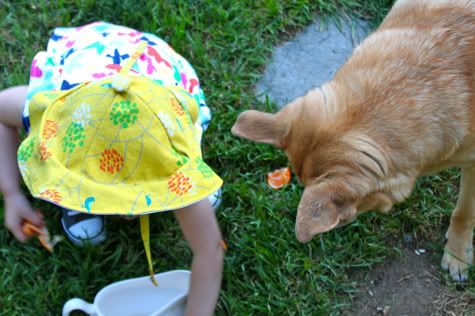
Isn't that fabric the cutest? It's a home-decor weight Etsuko Furuya I picked up at favorite fabric shop Fabricworm. Get the full DIY Summery Sun Hat Free Downloadable Pattern after the jump...
Summery Sun Hat Free Pattern
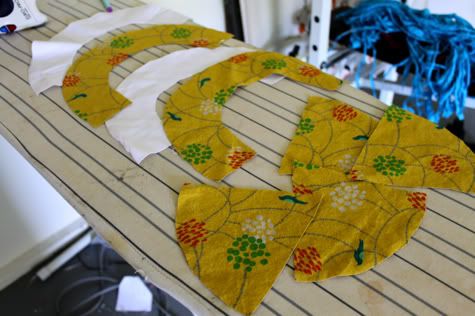
1. First download and print our summer sun hat pattern. Cut it out of the paper and trace onto the wrong side of your fabric. Download the pattern for free on google docs here: Prudent Baby Summery Sun Hat Free Pattern
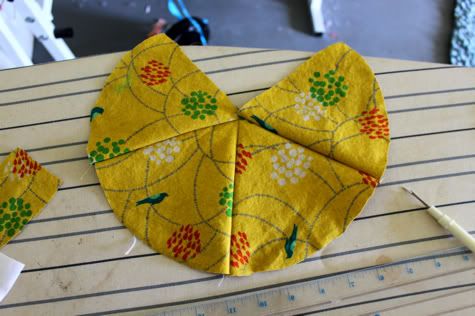
2. Cut your fabric out. Throughout this DIY you'll notice my hat is pointier and wider then yours. That's because I didn't love the shape I ended up with, so I adjusted the pattern for you. Yours will be cuter, but I didn't see a need to re-write and photograph the whole DIY (sorry):
2. Now we sew the hat together.
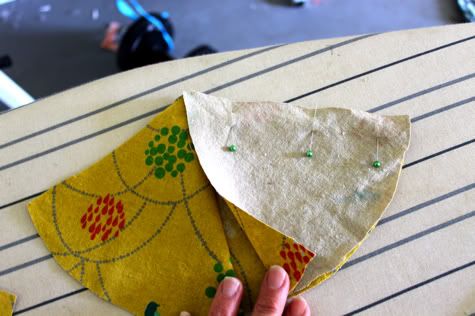
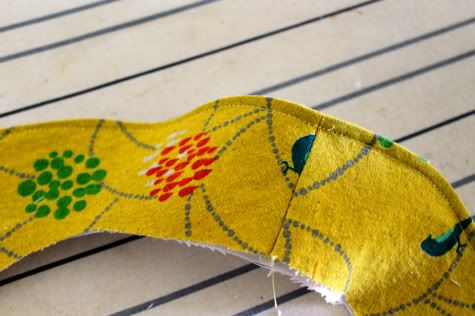
So you have four triangle-ish piece of fabric to form the shape of the hat. Take two of them and pin them right sides facing along one edge (not the bottom edge):
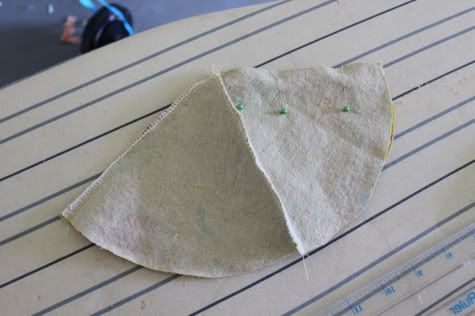
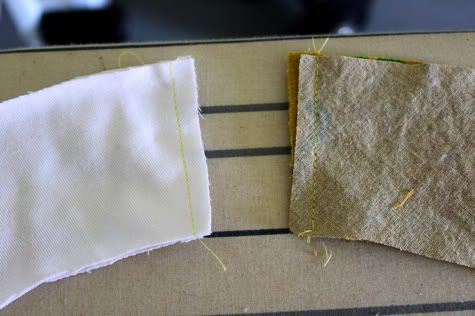
Sew them together along the edge and finish by serging, sewing with a zig zag stitch, or cutting with pinking shears:
Take another piece and pin it right sides facing to the other unfinished edge of one triangle:
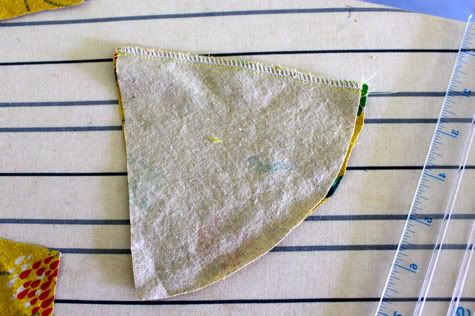
Sew it in place and finish the edge. Now you have a piece that looks like this:
Take your last piece and pin it right sides facing to another unfinished edge of your hat:
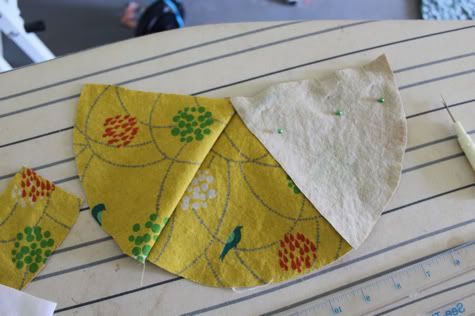
And sew it in place and finish the edges. Now your hat looks like this:
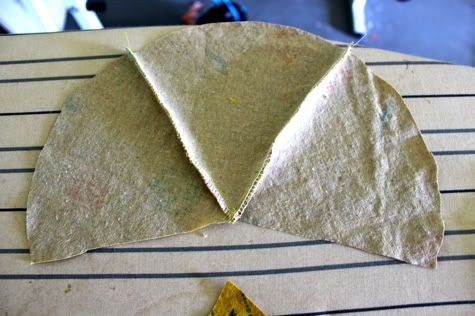
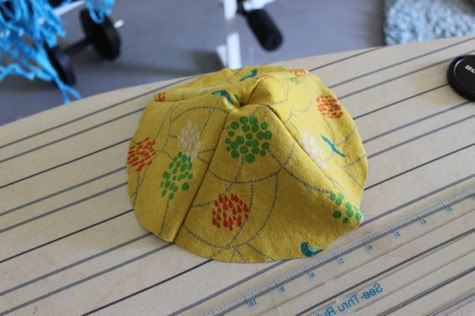
Fold that right sides facing and align the two unfinished edges and pin in place:
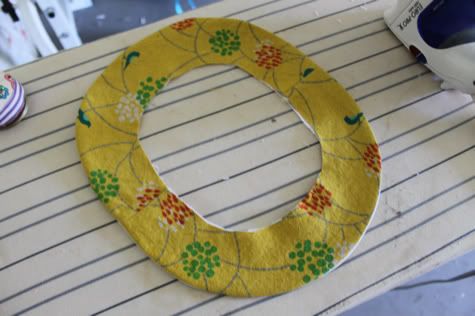
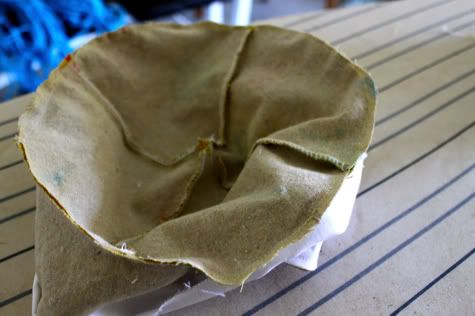
Sew them together and finish the edge. Now you have the top of your hat (except yours is less triangular):
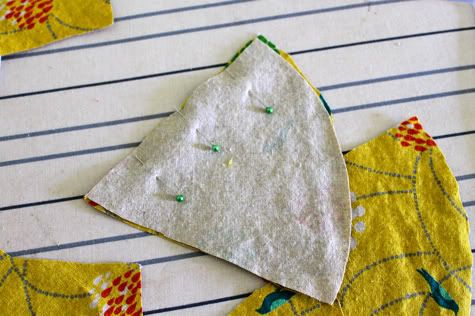
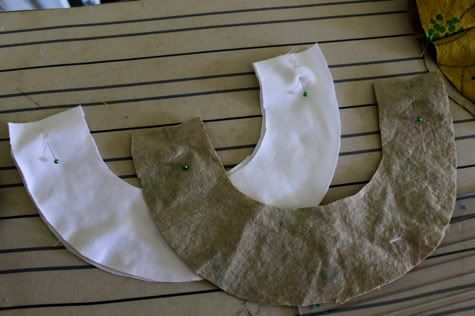
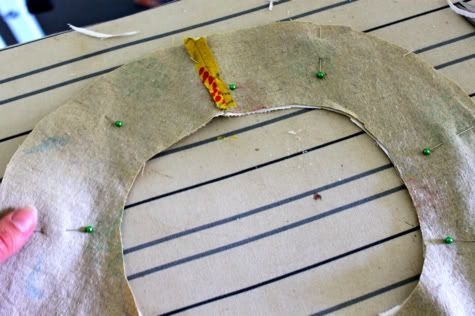
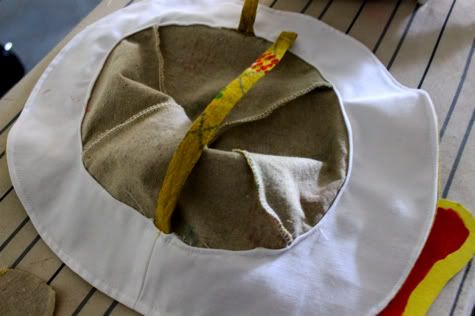
3. Now we create the brim. I did not have enough of my gorgeous fabric to do both sides of the brim the same color, so I used a white cotton for the lining of the brim (the underside) and my yellow fabric for the top. You have four "c"-shaped pieces. Lay the two lining pieces together right sides facing, and do the same with the two top brim pieces. Pin at the straight edges:
Sew each straight edge together:
Unfold and iron the seams flat like so:

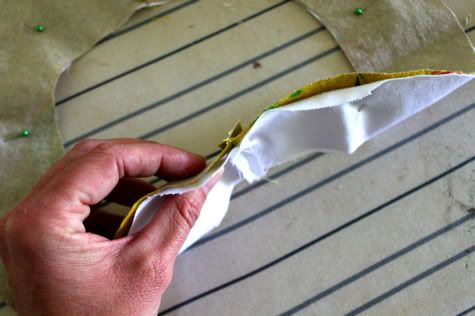
Now lay your lining right side up and your brim outer right side down on top of it:
Make sure the seams line up like so:
Sew all the way around the outside with a straight stitch and trim the edges:
Flip it right side out and iron it flat:
Top stitch around the outside edge. I used yellow thread on the spool and white thread in the bobbin so the stitch color coordinated with each side:
4. Now we will attach our brim to our hat. You want to turn your hat so you are looking at the inside, and place your brim over it right side down. Align the seams in the brim with the sides of that hat (so in the middle of one triangle pieces. Only pin the RIGHT SIDE of the brim to the hat, leave the brim lining unpinned. Start by pinning at the sides by the brim, then the top and bottom so you get it all aligned nicely:
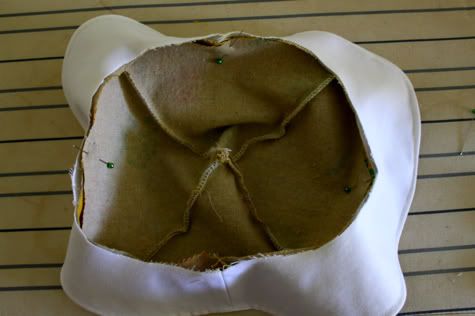
Flip the brim lining around, this will help you get your pins in more easily. Pin the rest of the way around:
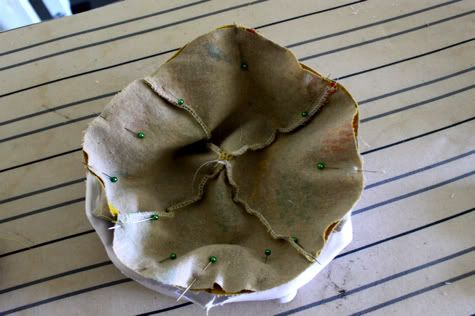
Sew the outer brim to the hat and remove the pins:
When you turn it around it will look something like this:

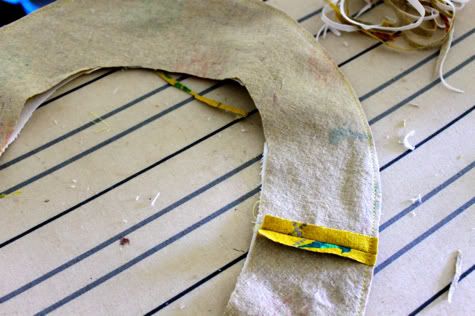
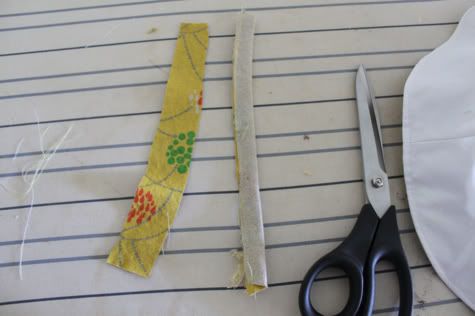
5. Let's make some strap really quick (not required). To make a strap, cut a strip of fabric, fold it the long way right sides facing and sew up the edge:
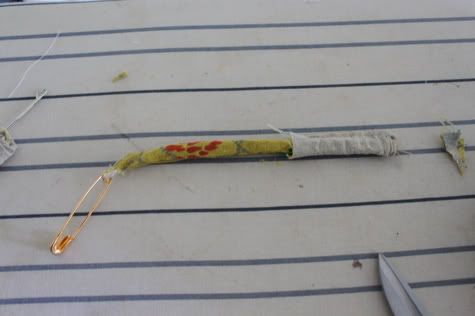
Use a safety pin or loop turner to turn it inside out then iron it flat with the seam on one side. Finish one end of the strap by either tying in a tight knot or folding one end over and sewing in place:
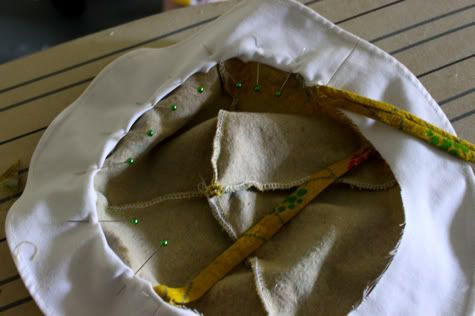
6. Now slip your unfinished strap ends between the brim liner and the brim at the sides where your brim seams are. Make sure the seam of the strap is facing to the inside of the hat. Now we are going to fold the unfinished inside edge of the brim lining to the inside of the hat, around the seam we made when attaching our brim to the hat. This is going to enclose the seam and finish the edge of the lining. At the straps, just fold the lining under a bit and pin. Here it is about halfway pinned so you can see the process.
Now you are going to stitch this in place. it will enclose the original seam and finish the lining edge. The other side of your stitches will be visible just inside the brim on the outside of the hat, so you might want to use two different colors in your spool and bobbin. This is called "stitching in the ditch" and it's a great technique, but you have to be a little careful so take it slow:
Turn that baby around! I added a fabric covered button to the top of the hat, totally optional. You're done!
Thank you Jaime and Jacinda for sharing your sweet little pattern with Grosgrain! I know I'm always scrambling for one of these in the summer and this pattern will almost certainly come in handy!
Stay tuned tomorrow for Casey of Casey's Elegant Musings!
Spread the word! It's a 30 day Free for All!


 Like not spending money?
8 {comments}:
This hat is so cute and simple to make. I know my neice needs a new hat for the summer. I think I'll look for some cute fabric this week. Thank you for the tutorial!
I was browsing the Tumtum Tree, and read this: "I don't know what I'm going to spend my money on after he leaves Target. Maybe I'll make MY own clothes too." http://the-tum-tum-tree.blogspot.com/2008/05/run-dont-walk-to-tarjay.html
Made me laugh. :D
Love this one!!! so cute, I am making one tomorrow to match a sunsuit I made today for the KWCW challenge
Hey! I know that alligator sitting on the cute crib sheet. My friend, Jocelyn, at The Nesting Spot made it. How cool!! http://www.etsy.com/shop/TheNestingSpot?ref=ss_profile
I made two of these hats yesterday! They came out very cute. I did make them for my 2 1/2 and 5 year old so I made them bigger. Easy to do, just extend the petal part (1 1/2 for smaller 2 1/2 for bigger.) and it worked.
This is so adorable and looks fairly easy to try. I need to just go for it! Thanks, loving this series .)
I made this hat too! Love it and it is easy to follow. It's on my blog!
http://laurenphd.blogspot.com/2011/07/baby-hat.html
Thank you so much for the free patterns. I am chipping away at making almost all of them! :)
LaLaLauren
I just made this and the tutorial was so nice and easy to follow! Thank you. I posted it on my blog at www.wethreemothers.blogspot.com. Love it!
Post a Comment