


Hello Monday! We have a great gal to start off a fresh week of Free Patterns!
Please welcome Rubyellen from Cakies!
I was introduced to Rubyellen's blog a very long time ago! Back when she only had one toddler and a very very small newborn;)
Now she has THREE with one more on the way! My how times have changed!
What caught my eye was her ethereal photography and adorable softies! Her life is like something out of a fairytale, whimsical and warm.
Now she has THREE with one more on the way! My how times have changed!
What caught my eye was her ethereal photography and adorable softies! Her life is like something out of a fairytale, whimsical and warm.

All of her projects and posts come from a place where crafting and motherhood intersect. She crafts to make her life more beautiful and homey. You can definitely feel the love for her family in her posts! Some publisher really needs to contact her! I can just see a book featuring her family oriented crafts!


And clothing for her sweet little girls!


 She's also super talented at hand embroidery!

Thank you Rubyellen for joining me in Free Pattern Month on Grosgrain! I'm completely delighted to share your inspiration with my readers.
Rubyellen, please take it away....
~~~~~~~~~~~~~~~~~~~~~~~~~~~~~~~~~~~~~~~~~~~~~~~~~~~~~~~~~~~~~~~~~~~~~~~~~~~~~
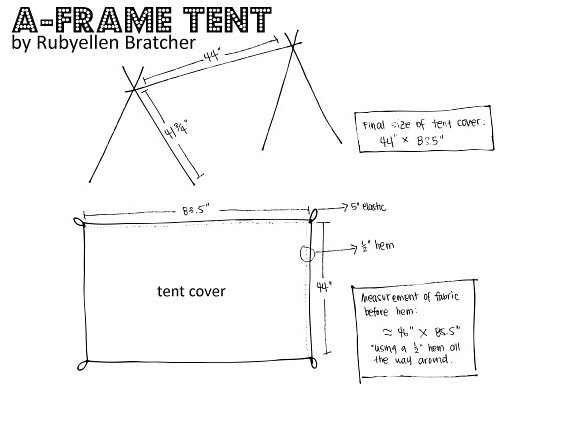
Hello Grosgrain readers!!! I am Rubyellen from Cakies and I am delighted to be able to share with you a fun tutorial on how to make the A-frame tent. I am sure your kids will be squealing in delight once they see what you whipped out for them!

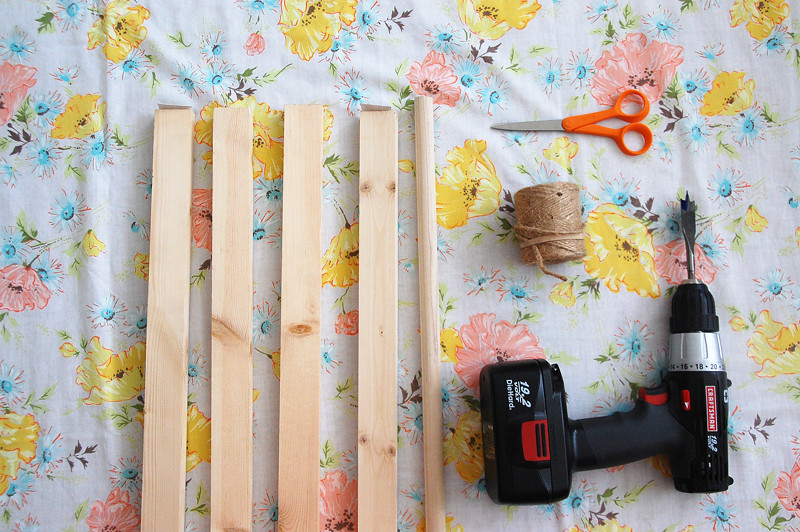
Materials for the A-frame:
4- 1'' x 2'' x 48'' whitewood moulding
1- 3/4'' x 48'' poplar dowel
drill with a 3/4'' spade bit
measuring tape
pencil (marker)
(I was going to use the twine to make sure the mouldings stayed in place, but I no longer needed to because the hole already had such a tight grip on the dowel).
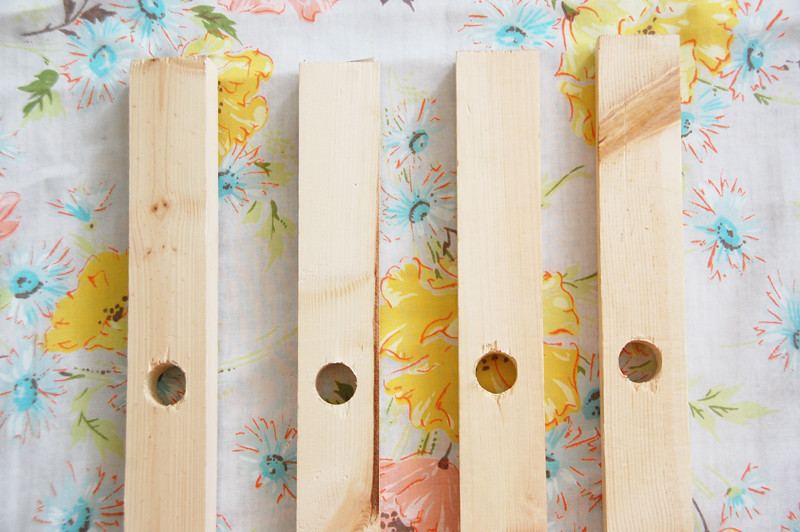
1. From the top of each of the 4 mouldings, measure and mark 6'' down with your pencil.
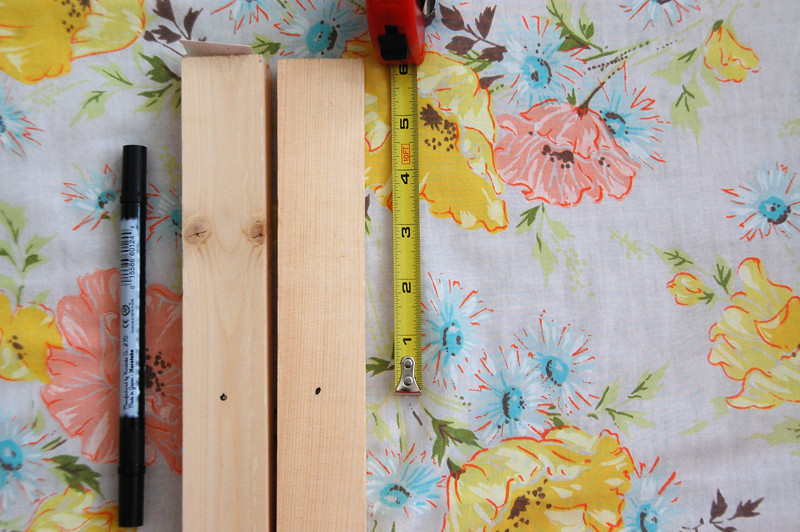
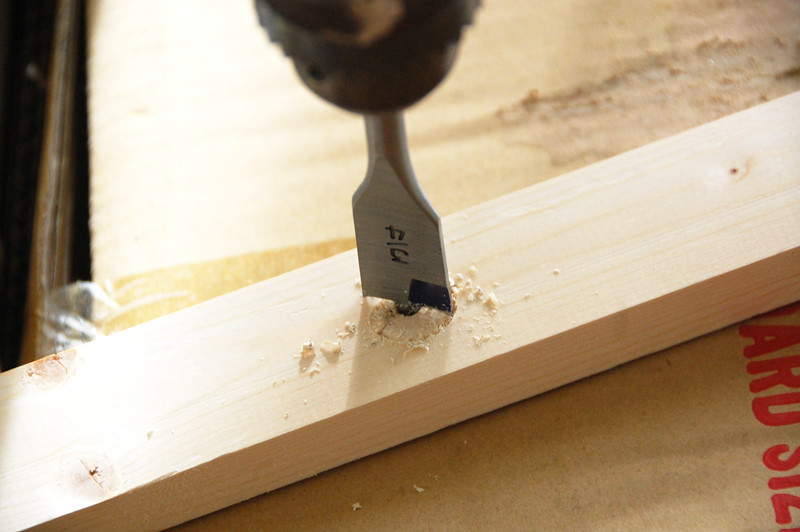
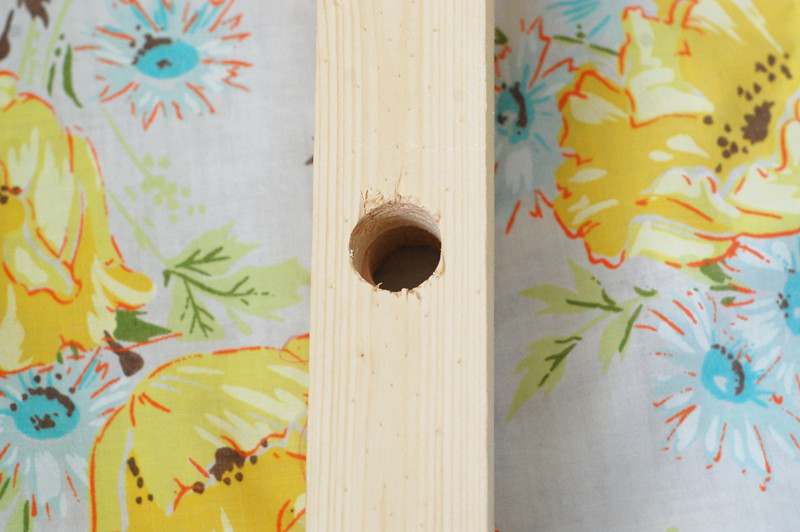
2. With your drill and 3/4'' spade bit, drill a hole at your mark. Try to center the hole on your moulding.
3. Place 2 mouldings on top of each other, make sure the holes are lined up.
4. Push dowel through the holes of the two mouldings. The hole should have a pretty tight grip and keep the dowel in place.
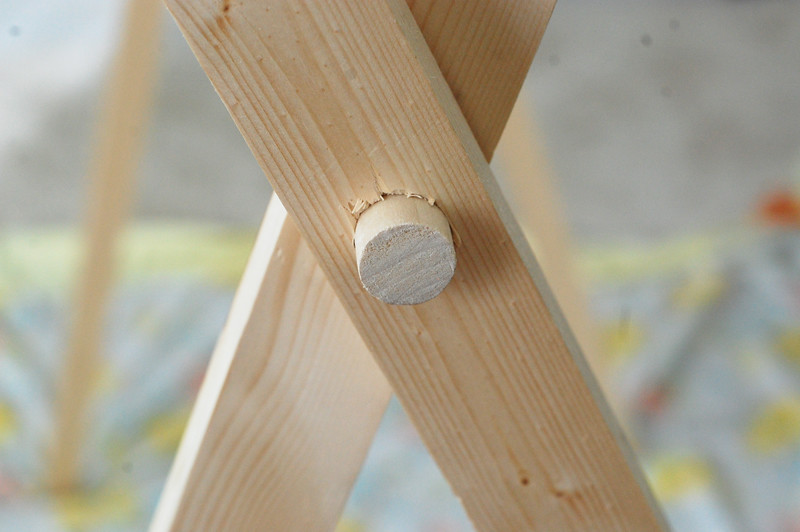
5. Repeat step 4 and put together the other side with the two remaining mouldings.
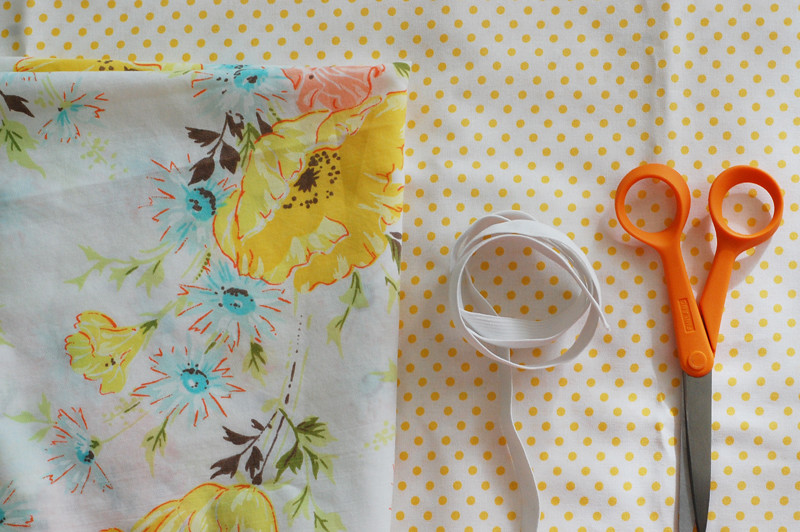
Materials for tent cover:
- fabric large enough to cover frame (approx. 46'' x 85.5'' un-hemmed; 44'' x 83.5'' hemmed)
- coordinating thread
- elastic
- scissors
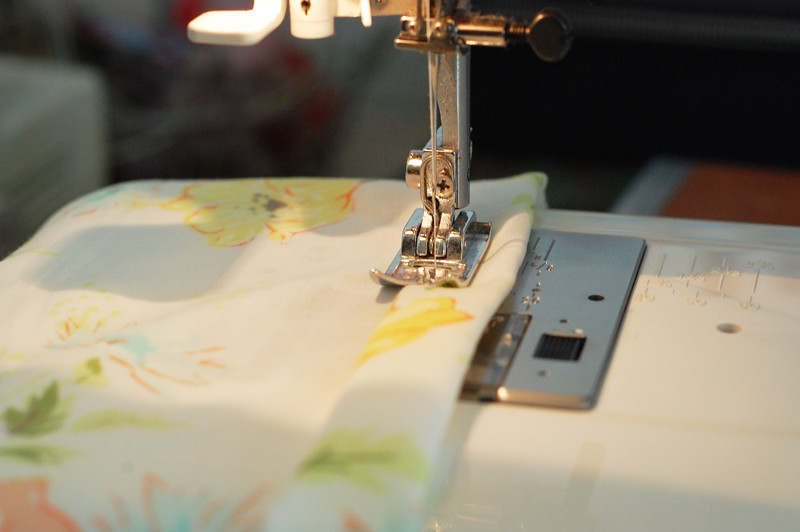
1. Hem the perimeter of the rectangular fabric using a straight stitch with a 1/2'' hem. Desired size of the cover is 44'' x 83.5''.
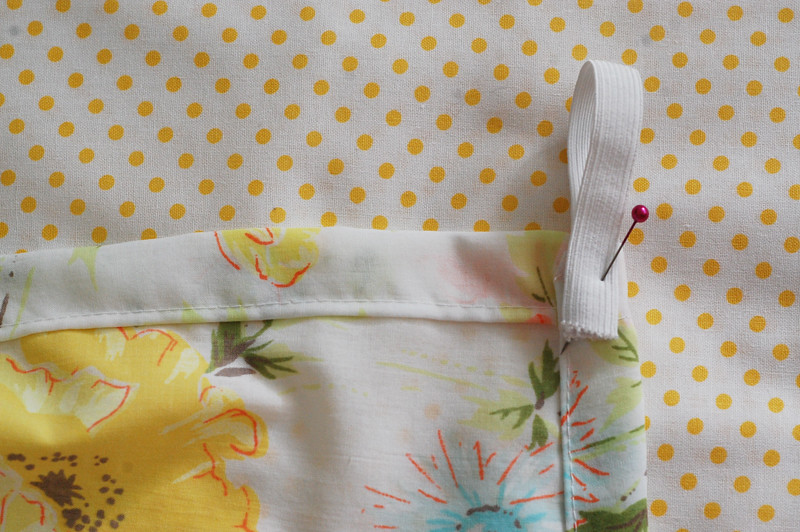
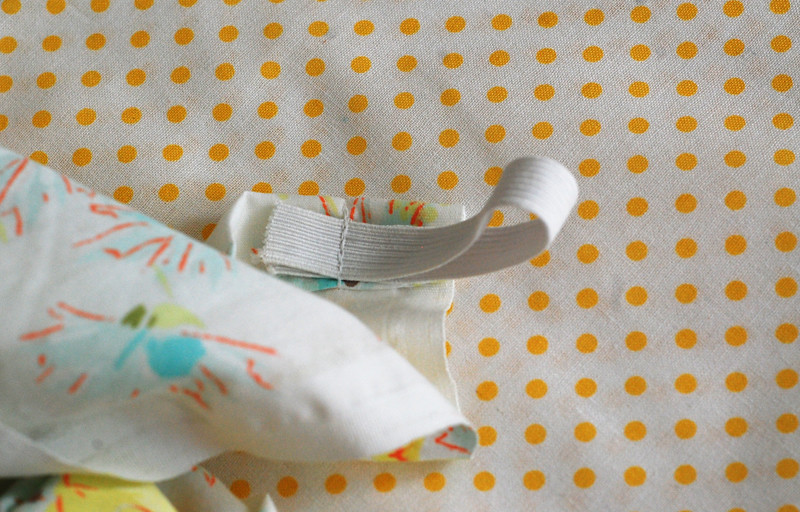
2. Cut 4- 5'' inch elastic strips.

3. Fold elastic over and pin in place at each corner of the tent cover.
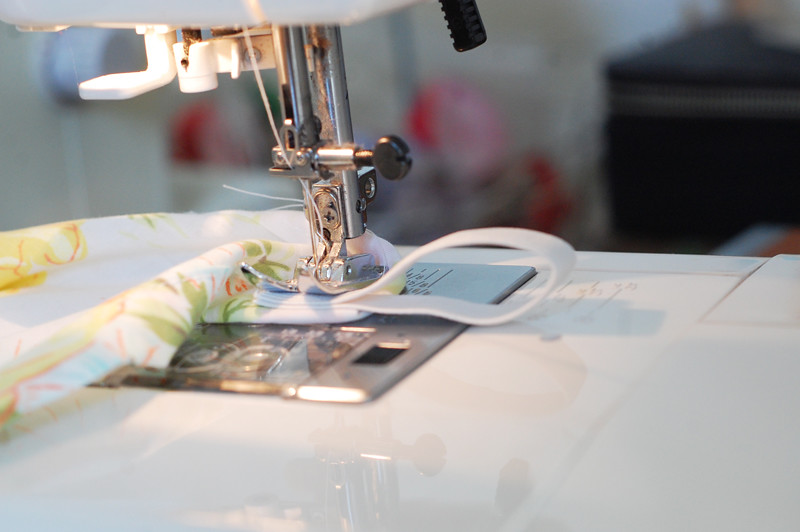
4. Sew elastic onto the corner of the tent cover. Repeat with the remaining 3 corners.
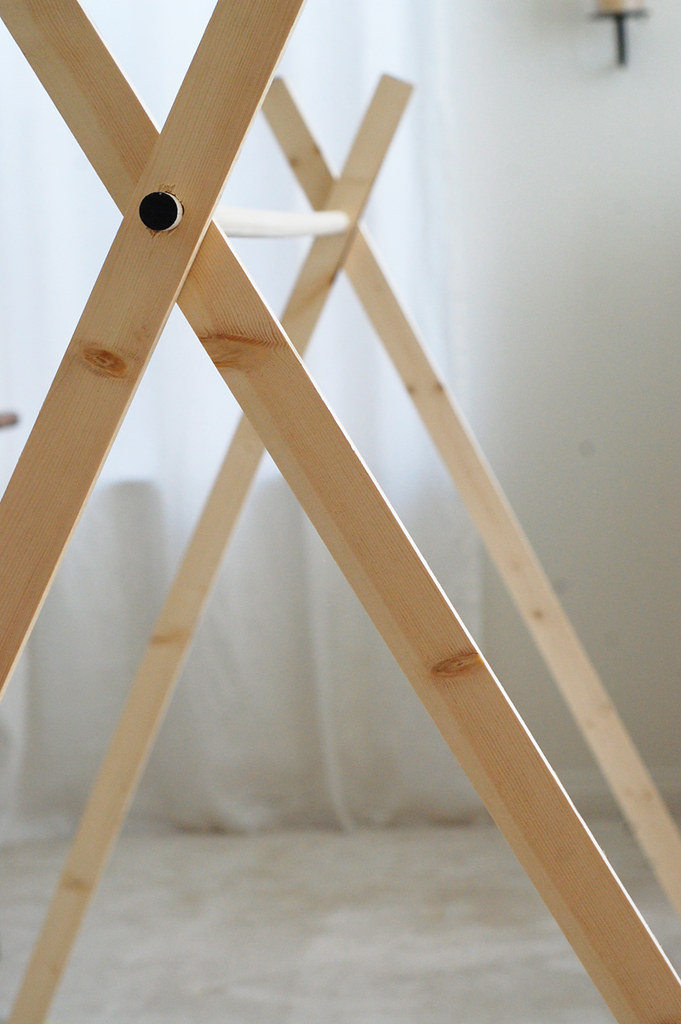
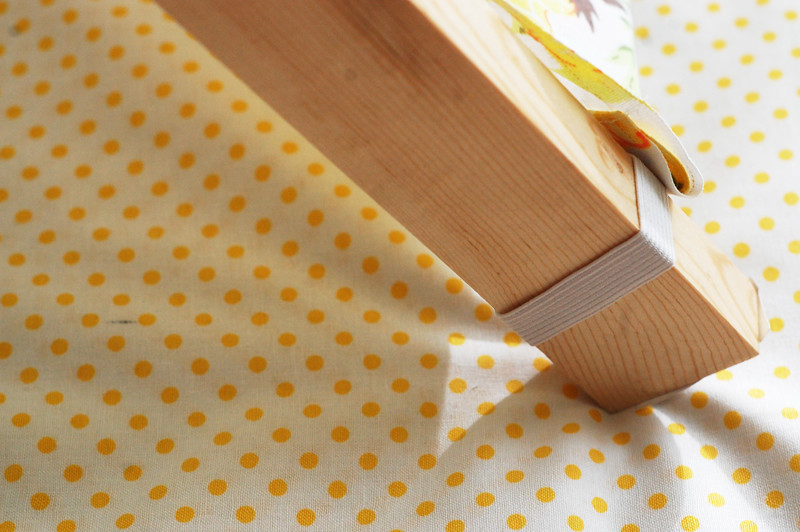
5. Drape cover over the A-frame and loop elastic to the bottom of wooden tent leg.
6. Arrange and straighten fabric cover. Then, spread frame to desired height and width of tent opening. Call your kids over and enjoy!!!
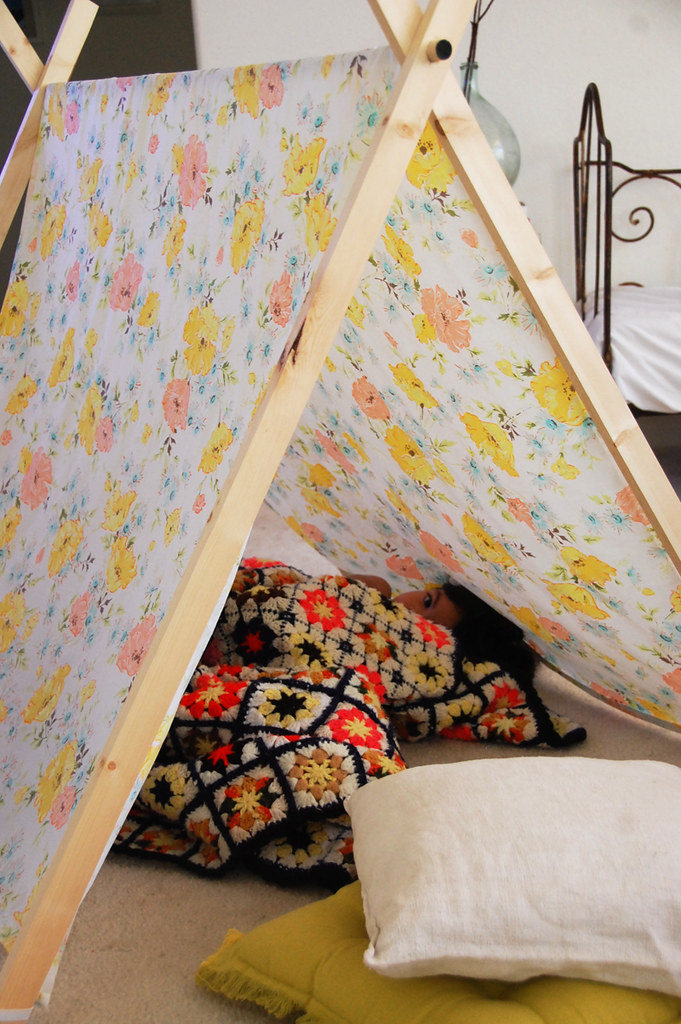
This tent can easily be taken apart and stored, since there are no screws or nails involved. In addition, the tent cover is easy enough to recreate in different patterns. It is a great place for reading, napping, and pretending, but most importantly making memories! I am already thinking this will be my go-to birthday gift as I am sure this would be loved very much. Don't you think?!!
Thank you Kathleen for having me as your guest! I look forward to your many more posts that will continue to inspire and awe all of us in the blogosphere!!!
Thank you Rubyellen for sharing another whimsical pattern with us! Your blog makes me want to drop everything and make a tent for my daughter's bedroom or a costume for their dress up chest. Your life is always inspiring me. Congratulations on your newest addition to come:)
Stay tuned tomorrow for Jaime & Jacinda of Prudent Baby!
Spread the word! It's a 30 day FREE for all!


 Like not spending money?
37 {comments}:
This is a must for long hot summer days!
I love this tent. I may have to make one for my nieces!
Thanks so much for this tutorial/pattern! I have really really been wanted to make my kiddos one.
I'm obsessed with little tents! I can't wait to make this!
I want to make a taller version of this with no fabric cover and beans growing up it.
This is AWESOME!!!
Am I reading this right that you could probably take a twin-size sheet and cut it down to size?
-Amy
Crafting by Candlelight
amy- yes! i actually used a vintage twin bed sheet for the project. i failed to mention that in the tutorial. good catch!
thank you kathleen for having me!!!! we have both come a long way since we started blogging and i am glad to have another blogging friend to share this journey with!!! xoxo
When my grandson comes to visit this summer I am going to make this with his help. He loves wood working, and I'll teach him to sew with this project, and I know he'll love it! Thank you for such a nice project and beautifully done instructions!
This is such a great tutorial. Any child would be thrilled to have one of these. Thank you.
this kids things are so sweet, Just a little tuch of ebroidery, and you get a perfect dress, or skirt, etc.
thank you, this is inspire me:)
I am going to get some camouflage fabric and make one of these for my nephew.
I can't wait to make this! My son will love it. Thanks for gathering and sharing all these patterns this month. I've bookmarked so many of them, I'll need to take a month off from work to make them all!
beautiful sheet, and a beautiful blog. You have a great sense of line and color.
This is fabulous! My kids, nieces, nephews and family kid friends would ALL love one of these! :)
LOVED this tutorial!!! Made one this morning in less than an hour!
here it is:
http://thehandmadehomemaker.blogspot.com/2011/05/yard-sailing-we-will-go.html
it's adorable! the fabric... the idea... the room it's in... ALL of it!!!
Just finished mine!! Thx for the tutorial!!
Love this! Adding it to my never ending list of possibilities for birthday/Christmas gifts! Mental Note: Start thinking about and making these gifts before November this year!
So great...I don't know what it is but kids just love them. I know I would have been in heaven as a kid.
I'm so excited about Rubyellen's blog and about this project! My girls and I made a list of 100 things to do this summer and an indoor campout was one of them. Now, we'll have fun making our own tents for the experience. Fabulous!!!
Thank you!
Jenn/Rook No. 17
I made one too, but added extra dowels for support to make a sturdier tent that would withstand a few toddlers playing with it: http://bit.ly/jbwUV9
This is wonderful. So easy and low cost. We just made ours. We have hardwood floor, so we made a fabric band to hold the tops together to prevent the tent to open all the way up.
Thanks, what a great idea, my toddler would love this!
http://eco-babyz.com
Just made one for my daughter's birthday. I am going to make two more for presents! Thank you.
Thanks for the tutorial - your tent turned out so nice too! I've got this linked to my play tents post as well today, nice job!
hi! i just followed the instructions (thanks!) and my wooden dowel is loose with the wood planks. I tied some string, which helped, but you do have any other advice for making it more sturdy?
i just finished it. thanks so much for the tutorial! http://www.lifeonchurchill.com/2012/01/our-little-tent.html
I love this idea do much that I'm at the store gathering the supplies. I can't wait to show this off on my blog! Come visit me at mamajillof2crafts.blogspot.com.
This is a wonderful idea. It is such a low cost way for kids to have fun in a slumber party tent
You made it look so simple to do, and it is very cute thanks.
Isaac
I really like tents and this one is no exception. I made this for my nephew and he loves the canopy tent, in fact he has slept in it for the past three nights!
I love this tent, you did a great job with the instructions! I was thinking of making a tee-pee for when my grandson is here for a week but I like this better!
This would be easy to take to the beach for shade too!
Oh wow!! great!! this is too good!! Nursing covers
Check out her newest on the asymmetric dress and blouses. She built an information site on them.
Has anyone found the size would mentioned that is untreated? If not the same size but it is untreated I would be interested as well.
Would you please share where you found? Links would be great!
Thanks!
Alison
very cute idea- :) thank you for sharing
Post a Comment