


 |  |
(Today's featured pattern above see below for tutorial)
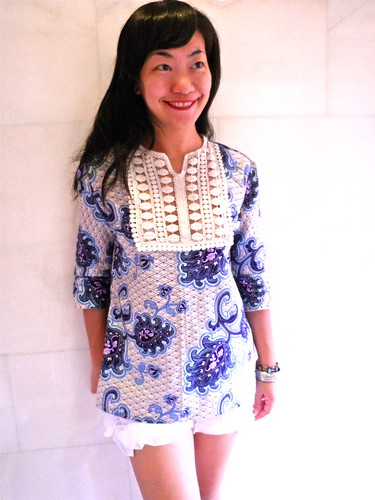
I found Adey of The Sew Convert through my flickr group. I believe the first thing she ever posted was her Merry-Go-Round Jumper back in July 2010 (featured below) and I fell in love. Since then she's made SO MANY more amazing dresses, blouses, shorts, etc. She never ceases to amaze! Seriously. She's talented.


Not to mention prolific!
Adey, is a former kids’ television channel manager turned stay home mum. She gets the name of her blog from her 'conversion' to sewing.
Says Adey, "I hated sewing since I attended my first home economic class at the age of 14. In 2007, something miraculous happened when God blessed me with a second pregnancy. I discovered that I was expecting a baby girl. That changed everything. First I went crazy shopping for handmade clothes for her on etsy."

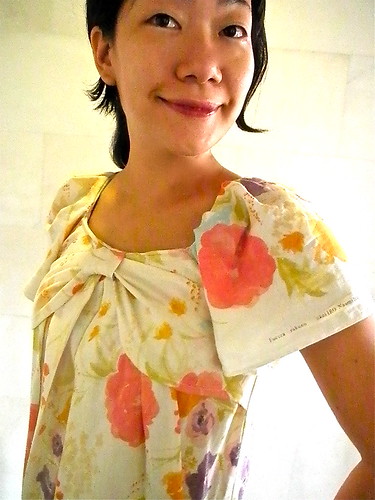 |  |
Now without further ado, I would like to introduce Free Pattern Month's FIRST pattern: The Sunny Resort Blouse Pattern courtesy of Adey of The Sew Convert!
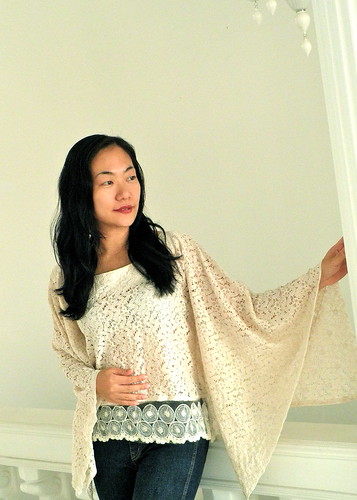

This pattern is fabulous for a vacation to the Greek isles or a weekend to the farmer's market. I love the way Adey used a white trim on the orange fabric.
 |  |
Materials Required
Fabric: I would recommend light weight fabrics such as cotton voile, lawn, gauze, lace or chiffon. The yardage depends on how long you want the blouse to be. I am 5 feet 7 and used one meter of fabric. The width of the fabric determines the length of the sleeves.
This blouse variation adapted from my 1-hour Kaftan tutorial is finished with bias tape instead of facings and comes with loopholes for a belt. You can use any belt or make your own by refering to my belt tutorial at http://sewconvert.wordpress.com/2011/02/18/behind-the-seams-the-40s-sweetheart-dress/
Embellishments (Optional) and contrasting bias tape
Scissors, Thread, Pins, Erasable Fabric Marker and Measuring Tape
A top/tee with round neckline
See diagram for reference through steps.


Fold your fabric into half (selvedges at the sides) and iron. The fold you have just ironed will be your shoulder ‘seam’. Use an erasable fabric marker to mark the centre of the shoulder ‘seam’. Cut the fabric across the shoulder seam.You now have one front piece and one back piece. Place your tee over the fabric, matching centre of tee to centre mark on fabric as shown.

Place pins around the front neckline of your tee. Use the erasable marker to mark points on the fabric. Join the points with the erasable marker. That is your front neckline. Match the back centre of the tee to the centre mark and trace your back neckline.
 |  |


Measure the widest part of your hip/ bust (whichever might be wider). For instance, mine is 37” so take 37”+3”/ 4=10”. From the middle of the front piece, measure 10” to each side (total 20”) and mark. You need to mark at two points. First, right at the bottom of the fabric (Point A) and second at the armhole level (Point B).
Step 4 (below two pics): Using a fabric marker, draw an arc from Point A to the top corners. Repeat for the back. Now your cut fabric pieces should look like these.
 |  |


Sew the front and back shoulder seams together, right side facing.
Step 7: Pin and sew bias tape along both sides of the joint front/ back piece

Measure yourself from the shoulder seam to below your armpit and add an inch. If you are making this for someone else, you can also measure her tee and add an inch. Measure from the shoulder seam of the Kaftan, mark this point. It is the base of the armhole. Mark the point where the base of your armhole meets Point B.

Step 10 (below two pics): Finishing the hem and create belt ‘loophole’
Finish the hem. Put on your new blouse and mark the point at the narrowest part of your waist. Ensure that it is wider than your belt buckle.
 |  |
Wipe off all the markings you have made cos’ you are done!
THANK YOU ADEY FOR ALL YOUR HARDWORK WITH THIS AMAZING PROJECT! IT HAS BEEN AN HONOR TO FEATURE HER PROJECT ON GROSGRAIN!
STAY TUNED TOMORROW FOR CHRISTIE OF A LEMON SQUEEZY HOME AND HER LOYALTY CARD HOLDER PATTERN!
Spread the word! It's a 30 day FREE for all!  | Spread the word! It's a 30 day FREE for all!  |


 Like not spending money?
27 {comments}:
Gorgeous! Such a great way to start the month.
LOVE it! Definitely bookmarking this to make!
I'm gonna make it right now for my upcoming holidays!
Love it! I saw something similar in Elle magazine a while back, and really wanted to make it, but the sleeves where square which I was not crazy about and I couldn't figure how to change them. This is soooo much better! I can't wait to get the time to try this. Very talented lady! I definately need to check out her blog! Thanks for hosting this!
Love it!! I adore Adey's sewing!!
This is just beautiful... very chic! I need to get some fabric for this one. Thank you so much for this series!
gorgeous - truly! Nice work!!! I would have to move the buttonholes for an empire waist blouse to fit me right now at 8 months preggo, but love it!
Beautiful work! I love all those pictures of things she's made--very talented!
Super cute. Thanks for hosting this, this is such a cute top to start the month (and summer!).
I love how chic this shirt looks and the pattern is so easy to follow! Thanks!
This is so cute! Thank you!
Gorgeous! As everything she makes!
I am leaving for Hawaii in 1 week. My hubby and I are staying at the Marriot resort. I am going to make this to take with me! I can't wait to sport it around and show it off =D
This is simply gorgeous. Thanks for the tutorial, I will definitely be bookmarking
I love the idea, so excited!
I can do this. I can. I know I can! Can't wait to get fabric for this! (of course nothing I have will do...)
LOVE Adey's blog and have been following it for awhile, so I'm so glad that you featured her pattern!
Thank you for having me Kathleen, it's such an honor! Can't wait to see the versions created from this tute! And am so excited to see the rest of the posts for Free Pattern month!
Thanks for sharing! I hope I get a chance to make this soon.
Beautiful! thank you to sewconvert and grosgrain for hosting this month of fab patterns, am looking forward to seeing the rest!
oh la la! this is great :-D have to do this...heheh!
Resembles an expensive pattern in the current Vogue Patterns catalog...I would just add you want to stabilize the neckline first with some stitching. Otherwise, it could stretch out. I would also add some kind of stitching on the raw edges of the belt holes. They will fray.
@MB: Thanks for the inputs! Actually, the belt holes won't fray as they are made using a buttonhole foot and sewed as an elongated buttonhole. hope that clarifies :)
Adey
@MB@YarnUiPhoneApp
Hi there! Thanks for the inputs, the belt holes will not fray was they are made using the buttonhole foot and sewed very much like an elongated buttonhole. Hope that clarifies:)
So I didn't put a belt in either of the two I made yesterday, but this gave me a great idea for a beautiful knit I had (which turned out great), and I'd made a test garment in a white sturdy knit that is turning out pretty well too - thank you for the inspiration!
I've begun to cut my fabric! I *will* make it work. Mine will (if all goes well) be light, satiny blue. :)
An easy way would I try it Thank you
Post a Comment