Embellish Knit Month: Day 20

November 30, 2010

I saw this cardigan on WWEPW and loved it. So Emma. Just neat and tidy.

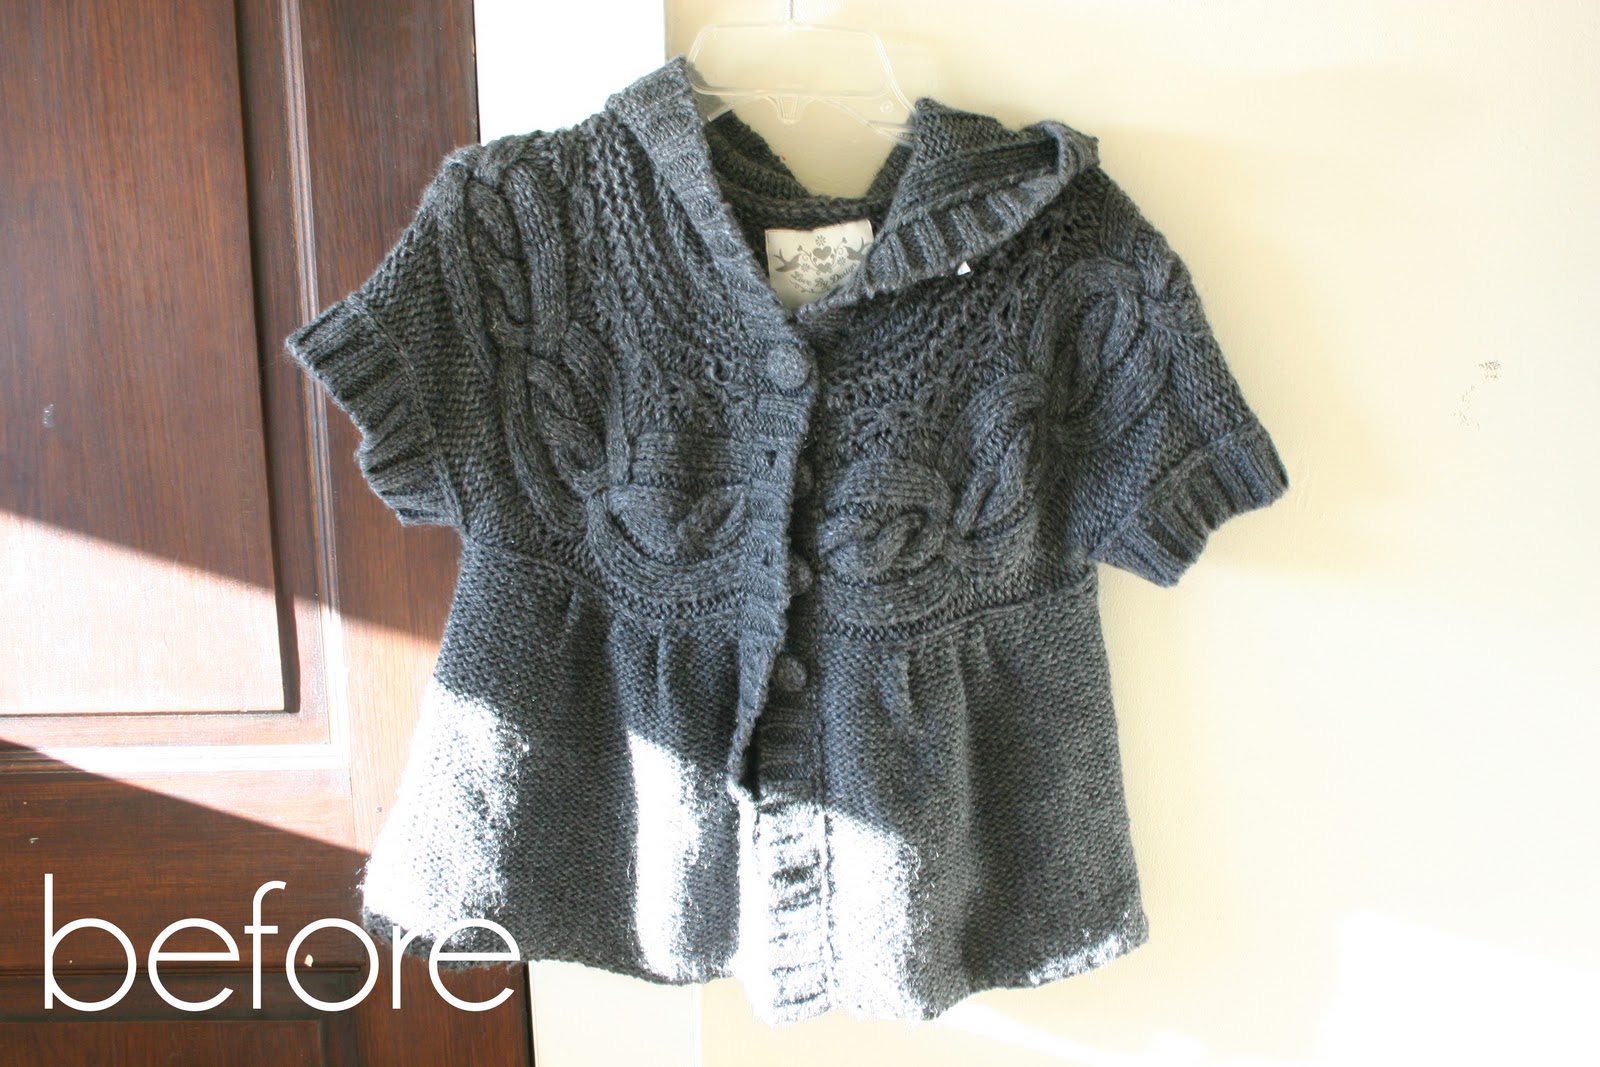
So I took a yellow cardigan that I bought at Community Aid for $1.50 and worked my magic. See the before.
Instead of white bias tape I used white rickrack to line the edges. Then I found a really cute yellow and white trim at my local fabric outlet. The entire spool was only $2.95. I'll have enough to last me a lifetime. But also enough to make these variegating flowers for the front.
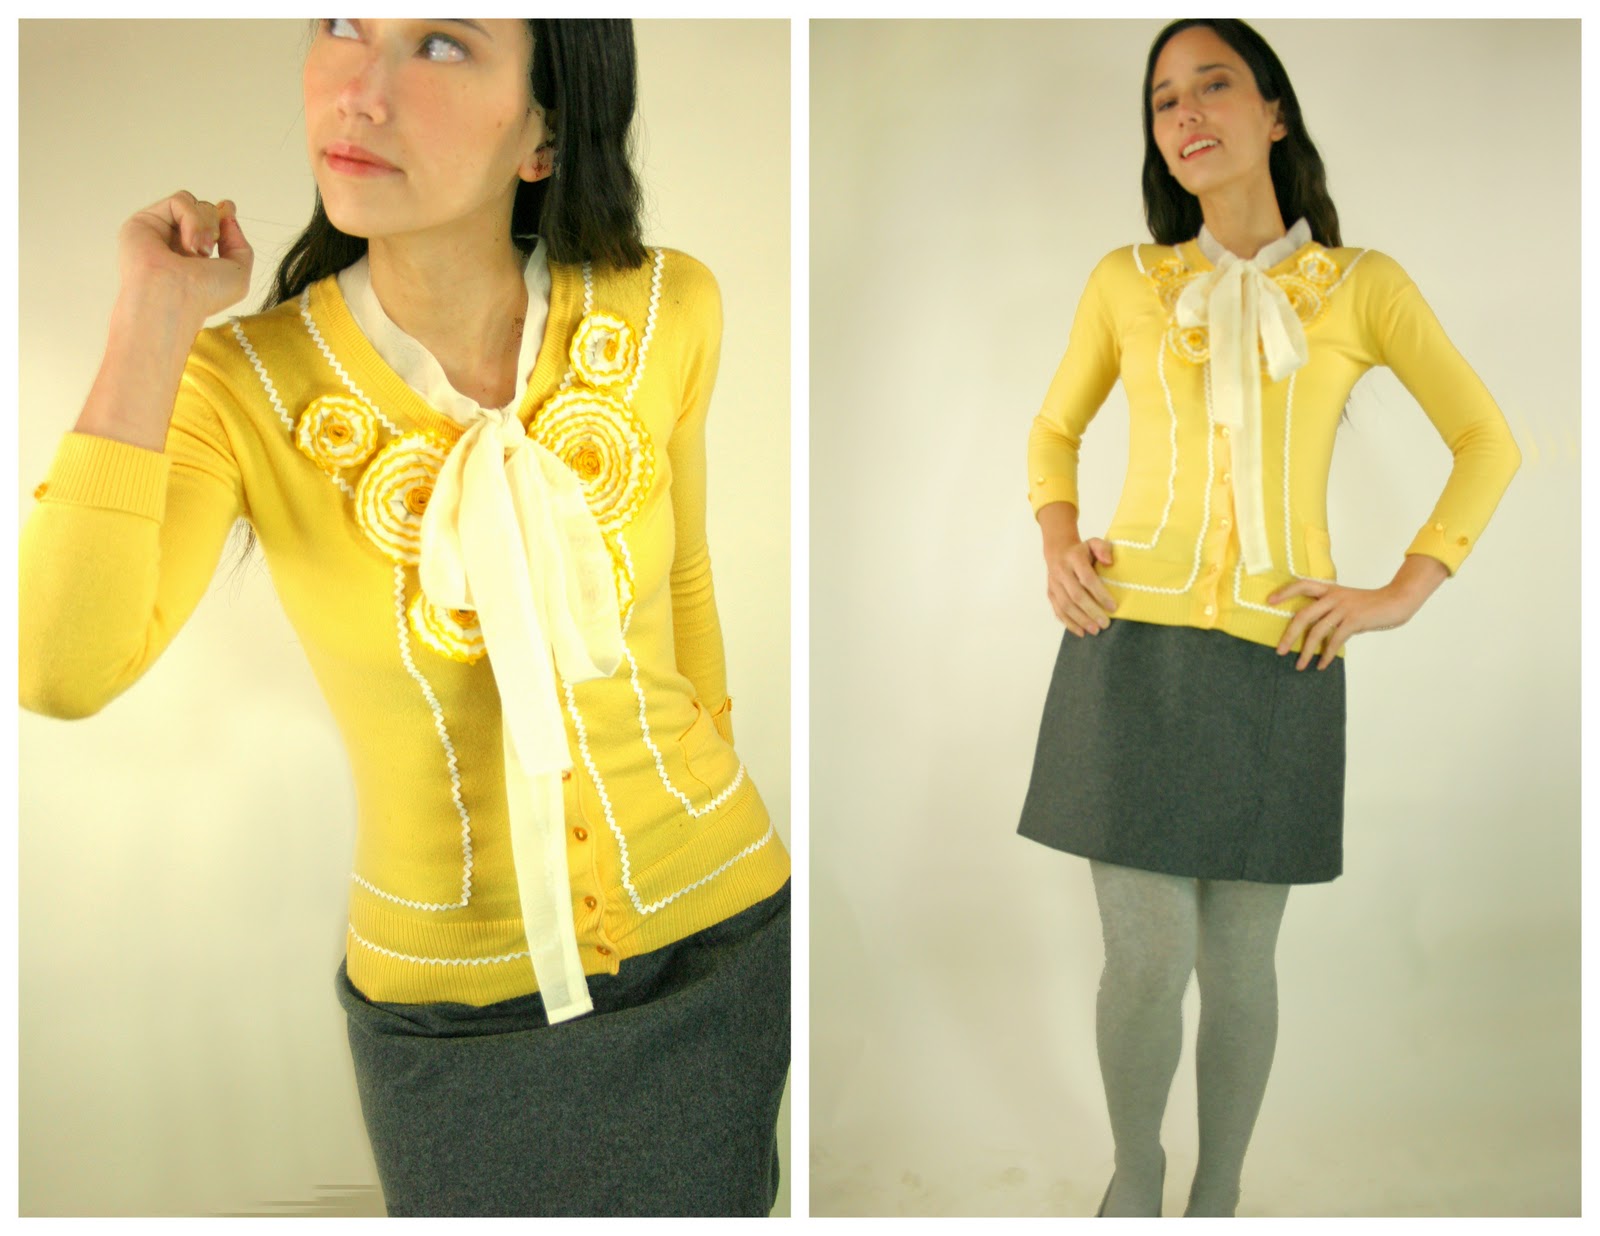
Finally I liked the white tied blouse that Emma had underneath her sweater but I don't have one of those in my closet. So I took a scrap piece of sheer fabric and made my own faux necktie blouse and hand sewed it into the sweater.
1. I used a disappearing marker and measuring tape and drew a guide for where I'd be sewing my white rickrack. I drew an inch from the the edges and an inch and a half from the bottom.
2. Then I sewed the rickrack using the disappearing marker as a guide.
3. Then I made another guide next to my rickrack an inch and three fourths away. Then sewed another line of rickrack using the guide.
4. To make the flowers I used a yellow and white scalloped trim and felt circle. I hot glued the trim around the circumference of the circle.
5. And gradually spiraled it into the center. Then I attached the flowers by sewing them on. But you can also use hot glue.
6. To make the faux tie, I took a piece of sheer fabric 3 yards long and four inches wide and sewed it lengthwise and then turned it inside out. Then turned in the ends toward the inside and sewed shut.
7. Then I pinned it to the collar.
8. And hand sewed it to the sweater so that the thread went through one side of the collar ribbing and not the outside so that the threads would not show.


Done.

Embellish Knit Month: Day 19 MEET CASEY'S ELEGANT MUSINGS!!!!

November 29, 2010

 
Today's guest for Embellish Knit Month is Casey from Casey's Elegant Musings! She will be showing use how to make a detachable faux fur collar for a cardigan. Wouldn't this be just divine for a holiday party?
11.17.10 vintage flair: make a faux fur collar!
But first, a little bit about Casey (who is absolutely lovely BTW! Right?!) Casey is the author of the darling blog Casey's Elegant Musings. She sews and designs her own dresses with a flair for retro style. Often her dresses can seen on the front page of Burdastyle.
But I'll let her tell you a little bit about herself in person....


When did you start sewing?
    My earliest sewing memory is from around age 5 or 6. My mom sewed a lot when I was little, and I used to watch her makes clothes and other little things for my sister and I. I loved how she could take a pattern, fabric and some trims and make something really pretty--to me that was magical. I begged her to teach me how to sew, but it wasn't until age 10 that she taught me how to use a sewing machine. Until then, she showed me some handstitches and let me rummage through her scrap bin for pieces to make doll clothes with. I also taught myself a lot of sewing techniques from books I checked out at the public library during my childhood--it wasn't until my late teens that the internet really started to help expand my sewing knowledge beyond what the library books could show me. So I guess I've been sewing for about 20 years now!
Why do you sew?
    I sew primarily because I love to create things and adore fashion. It's about aesthetics and catering to my own sense of style and self. But it's also got a lot to do with economy and not being able to afford the quality of clothes I admire and the fit I want with my budget. Caviar tastes on a canned tuna budget! There is something really fascinating about the whole process too--I think it's a carry-over from the "magical" view I had of sewing as a child. 

What sparked you to begin a blog about your creations?
    I started blogging back in 2004, on LiveJournal. At the time I was heavily into historic fashion and costuming; many of the friends I had met on discussion boards were also on LJ, and we shared projects, research and techniques through our blogs. My blog has morphed a bit--I now write more about vintage fashion and style, thrifting, general sewing and homemaking--and moved to my own blog-space. But I love sharing my adoration of sewing with others, encouraging them and inspiring. I have met so many talented people out there who sew--who have taught me a lot too!
What benefits, besides your lovely blog, have you experienced from sewing your clothes rather than buying new ones?
Oh golly--where to start?! As I mentioned before, the ability to customize my own wardrobe on a tiny budget has been the biggest advantage. I love scouring for the raw materials--be it fabric from a discount table or trims and notions from the thrift store--and being able to create something that fits within my personal style and fits well. It's part of the adventure! Being able to look into the catalogs, websites and vintage inspiration, take those looks and recreate them is so much fun--and really stretches my imagination and sewing abilities. I also have to say on the blogging/sewing topic that one of the biggest benefits has been the amount of knowledge I've gained from other sewing bloggers. Finding about new techniques, improving old ones, discovering new books and resources--it's been an amazing boon to my closet.


Thank you so much, Kathleen for featuring me--it's been such an honor!
And now for the FAUX FUR SWEATER TUTORIAL BY CASEY HERSELF:

Silhouette Machine Winner & Cyber Monday Offer!!

Well, the time has finally arrived! I hope you have all enjoyed this past week. This giveaway was certainly a popular one! I had a record number of comments 3,400! Can you believe?! A lot of you must really want this machine:)

If you would like to receive regular updates on winner's every other Wednesday please follow this blog using this link or the link in the right sidebar. Winners, please email mytumtumtree@gmail.com so that I can get your contact information.

Okay, so moment of truth....the winner of the Silhouette Machine giveaway isssss Melissa Burford of Burford Designs!! Congratulations! Please email me so that I can forward your info to Silhouette.

-------------------------------------------------------------------------------------------------------------------------------------------------------------

Now, if you didn't win please don't be too sad. Silhouette didn't leave you out in the cold this chilly Cyber Monday. Because until midnight tonight Silhouette is offering Grosgrain readers $100 OFF their own Silhouette machine, which is a PRETTY impressive deal if I might say so. That's a new silhouette machine for only $199!

Use code: GGF

This code will only be good TODAY and TODAY ONLY until midnight EST.

You will also receive with your order:

1 Roll of Cream vinyl ( $7.99)
1 Roll of transfer paper ( $7.99)
1 Home decor CD (Value $55)

Total ($70.98)

All for ONLY $199!!
That's almost $200 dollar in savings!
AND IF THAT DIDN'T IMPRESS YOU, HERE ARE JUST A FEW EXAMPLES OF WHAT THIS AMAZING LITTLE MACHINE CAN DO!

Embellish Knit Month: Day 18

November 26, 2010

This is a simple change that you can do to sweaters that are too.....juvenile.

I don't like hoods on sweaters. There was a time in my life when I loved hoods. That time was in my teens and early twenties. Now I see them as adolescent. Which makes sense since I liked them....in my adolescence.
Now when I see a sweater in the thrift store that looks great but has a hoodie my heart sinks a little. 

I found this American Eagle sweater at Community Aid for $1.50. See the before. It looked great in the front, had a thick but breathable knit, and cute cropped length. But upon further inspection realized that it unfortunately had....a hood. Booo.
So I took it home and quickly  discovering that altering a hoodie into a collared sweater is quite simple. And I don't have to be disheartened by cute hooded sweaters any longer.

If you too hate the way hoodies look but love some of the thrift store goodies, check out this tutorial.

1.Measure how much you want to keep (about 5") from the neckline into the hood.
2. Cut off excess hood.
3. Cut off ribbing from excess hood.
4. Attach ribbing to raw edge of sweater collar by laying the ribbing next to the raw edge and use a zigzag stitch.


If the ribbing is too short you can stretch it a little.


Done.


Stay in and Shop this Black Friday

The Canvas People is running a huge promotion 50% off and entire order PLUS FREE shipping! Now through December 3rd. So this WILL end.

Enter code: BlackFriday

This is an especially great deal if you want to create a LARGE canvas for over your mantel or a focal point on an empty wall.

That means you can buy their second largest canvas for only $44.49!!!! That includes shipping.

Or buy their LARGEST canvas WITH A FULL BLACK FRAME for only $64.47! That INCLUDES shipping too. That would be an impressive gift for a relative or spouse!

Happy Black Friday shopping!

Favorite Part of the Holidays?

November 25, 2010

Mine? Scattergories! Looking forward to playing with the fam tonight. Our box looks pretty much like this and has every sheet ever played, saved. What's your favorite part of the holidays?

Embellish Knit Month: Day 17

November 24, 2010

I saw SUPER cute sweater on WWEPW. It's a Kate Spade Cardigan that you can buy on eBay for $200. Love it....but no thanks. On the other hand, I knew what my next sweater would bee:) Oh and BTW, What Would Emma Pillsbury Wear is THE BEST place for cardigan inspiration.
I took a plain black sweater that I bought at Community Aid for $1.50. See before. First off, I liked the Kate Spade version but I wanted to add a little of my own flair. So I added a scoop neck peter pan collar and cute yellow mini knob buttons.
I think the idea is so whimsical. When paired with a black and white skirt and yellow and white ruffled undershirt (which I bought at the Sal Val or $2) it looks really neat. The skirt is from H&M. I bought it for $12.99. And last night I bought a pair of black chevron over the knee tights online to wear with this outfit. For now the plain black nylon thigh highs will do. And I WILL be wearing this ensemble for Thanksgiving dinner. It's just too cute:
The yellow balloon was the most expensive part of the outfit! But wasn't it worth it?! I bought it at a party store down the street from my home for $15+tax. It's 3' wide and blows up to be a perfect circle. So lovely. I took it home where it was promptly popped by Molly within 5 minutes. We were all sad. But I'll be keeping the big round balloon idea in my back pocket for later.I know I'm sort of behind this month but don't worry, I'll probably be extending into December until I get to 30. Actually I'm really kinda liking having all these new sweaters. My daily wardrobe decisions have exploded!


Step 1: First I made the sweater into a cardigan. See day 6 for details on how to do that. Then I cut a scoop neck out of the front of your sweater. To do this I cut one side then folded it over and used the cut out piece to cut the other side so they matched.
Step 2: Cut the back of the neckline just below the ribbing of the neck.
Step 3: I took an existing scoop neck peter pan collar front pattern and cut out my pieces from another old white sweater. Four pieces total. If you don't have one I would recommend using a piece of scrap fabric and placing it on top of your sweater and then cutting it in the shape of a peter pan scoop neck collar plus 5/8" allowance on all sides. Then use that as your pattern template.


4. Cut two pieces of white sweater fabric around the back of the neckline. To do this using a piece of scrap fabric and placing it on top of the back of the sweater and ON ONE SIDE ONLY cut in the shape you would like plus 5/8" allowance. Place the template on the fold of your sweater fabric and cut. Do this twice for two pieces.
5. Sew the pieces right sides together leaving the inside unsewn.
6. Sew to sweater, right sides together. Then topstitch around neckline edges to secure the collar down.
7. Cut pieces of yellow, white and black fabric to make a felt bee.
8. Then super glue together.
9. Sew to sweater in desired position.
 10. Then I sewed on the buttons.

11. Using a tapestry needle I threaded a silk cord into a swirly pattern on the sweater that led to the bee.


Related Posts Plugin for WordPress, Blogger...